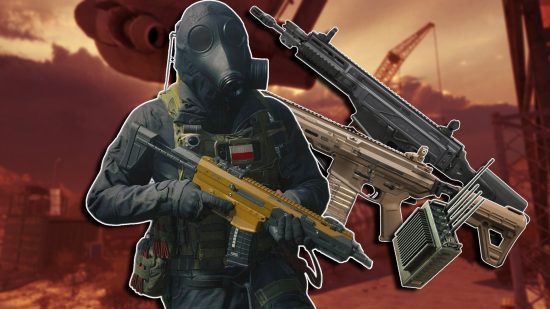
What are the best MW3 loadouts in Season 1? Call of Duty Modern Warfare 3 makes some serious changes to the way weapons and loadouts are handled, along with the addition of lots of new toys to play around with. As a result, this makes cooking up the best MW3 loadouts even more complicated than it has been in previous games, though we’re glad to see weapon tuning removed at least.
Using our many, many hours in Call of Duty MW3 and its multiplayer mode, we’ve used our first-hand experience to put together a list of all the best loadouts and class setups you should be using. We’ve had great success using these during our time with the game for our MW3 review and beyond as we dig deeper into the evolving MW3 meta. So, these are all the best loadouts to try out in MW3 multiplayer during Season 1.
Best MW3 loadouts
The best MW3 loadouts are:
Right now, these are the meta loadouts we’ve come across in MW3, boasting consistently high performance in all the core game MW3 modes. We’ve put each weapon through its paces in multiplayer matches and dug deep into the stats by visiting the Firing Range and tweaking each attachment until the weapon felt just right. In other words, these loadouts are cooked to perfection. If you’re in a hurry to unlock all the MW3 camos and complete the Mastery challenges, then you’ll need these loadouts.
Not only that but these best MW3 loadouts are also backed up by in-game weapon statistics and data on community weapon usage found on WZStats.gg, which help reinforce just how effective these best MW3 loadouts truly are – we’re not the only ones having success with them.
One thing you might immediately notice about the MW3 best loadouts that we’ve highlighted is that it consists largely of assault rifles and SMGs, rather than battle rifles, shotguns, LMGs, and so on. While there are certainly strong weapons found in other weapon categories, ARs and SMGs have almost always dominated Call of Duty multiplayer, and that’s now different in MW3 2023. Assault rifles and SMGs are simply the most versatile and consistent weapons, which matters in such a fast-paced game like MW3.
Nevertheless, read below for more information on each of the best MW3 loadouts, including the best attachments, equipment, and gear to use for the full class setup.
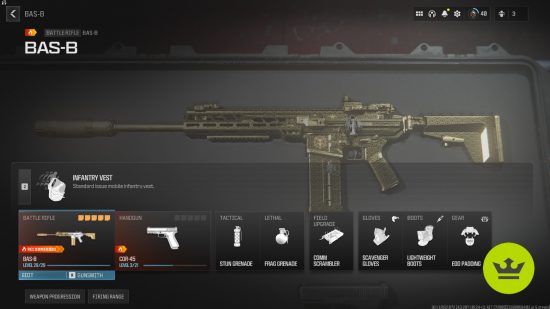
BAS-B loadout
- Primary: BAS-B
- Secondary: WSP Swarm/Rival-9
- Vest: Gunner Vest/Overkill Vest
- Tactical: Stun Grenade/Flash Grenade
- Lethal: Breacher Drone/Frag Grenade
- Field Equipment: Comm Scrambler
- Gloves: Quick-Grip Gloves
- Boots: Lightweight Boots
- Gear: EOD Padding
The BAS-B battle rifle is undoubtedly one of the MW3 best guns to use in the meta right now, so it should be no surprise that it features in our list of the best MW3 loadouts. In fact, you could make an argument for it being completely broken. With the best MW3 BAS-B loadout, we unlocked Gilded (the new version of the Gold camo) in just two hours.
The BAS-B is incredibly hard-hitting. From our experience, the BAS-B outmatches most assault rifles at range and even many SMGs at close range if you can aim under pressure since all it takes is a few well-placed shots. That’s why our loadout focuses on improving recoil control and ranged damage to further refine this excellent weapon.
Then, we recommend suiting up with the Gunner Vest. This not only lets you have a second primary weapon, which is ideal as the BAS-B is not intended as a CQC weapon. However, it also increases reload speed and lets you spawn with max ammo. Given the BAS-B and battle rifles in general are rather sluggish and ammo-hungry, it’s a perfect pairing. With that said, you will lose access to the Boots slot.
If you’d rather keep the Boots slot available, then you can’t beat the Overkill Vest. Like the Gunner Vest, you’ll be able to equip two primary weapons, but you’ll gain increased weapon swap speed and the ability to reload while sprinting
As for throwables, you’ve got lots of options. The Stun Grenade and Flash Grenade are both very similar, serving to give you the leg-up on dazed opponents. Since the BAS-B is a rather hefty battle rifle, this is ideal if you’re forced into close-range fights. On the other hand, Frag Grenades and the Breacher Drone are both great for pushing enemies out of cover if they’re not already dead.
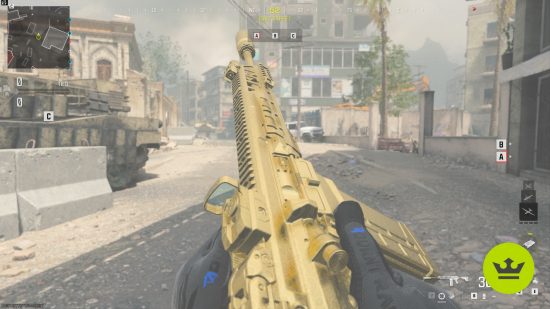
From here, we recommend the Comm Scrambler as it works wonders against enemy surveillance. When active, enemies within its radius can’t use killstreaks and you won’t be detected by UAVs. This is great for getting the drop on your foe by limiting their options against use. However, the A.C.S can also be a great alternative in objective-based modes like Domination or Hardpoint, as you can place it on an objective to trick enemies into thinking you’re on point. In reality, you’re sat back waiting for them to walk right into your trap, BAS-B at the ready.
For gear, we recommend the Quick-Grip Gloves and Lightweight Boots, as well as EOD Padding. Overall, the goal is to increase mobility and agility so you can get into strong positions with the BAS-B, or quickly swap weapons in a pinch. If you’re using the Overkill Vest, we recommend using the Marksman Gloves instead as this item already includes the effects of the Quick-Grip and Command Gloves.
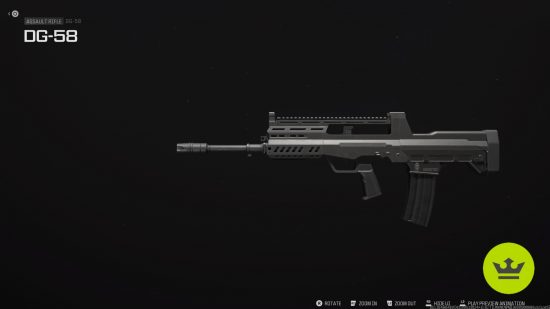
DG-58 loadout
- Primary: DG-58
- Secondary: WSP Swarm
- Vest: Gunner Vest
- Tactical: Stun Grenade/Flash Grenade
- Lethal: Breacher Drone/Drill Charge
- Field Equipment: Comm Scrambler
- Gloves: Marksman Gloves
- Boots: N/A
- Gear: EOD Padding
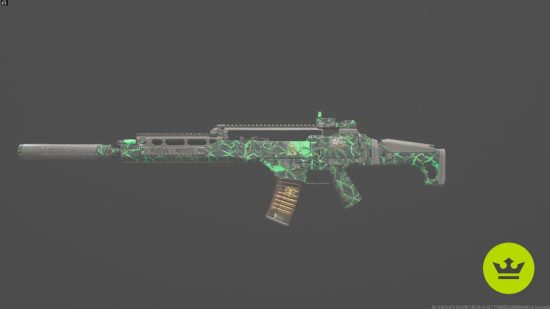
While some prefer the FR 5.56, it would be impossible to deny that the DG-58 assault rifle is the king of the crucible right now, being part of the best MW3 loadout there is.
This three-round burst assault rifle takes just four shots to kill opponents at up to 35.6m, one of the best effective ranges for an assault rifle. This means you’ve got one of the deadliest weapons in the entire game, all you need to do is tone down the kick slightly to better hit bursts and improve the handling so you can drop enemies at any range.
That’s why, in our MW3 DG-58 loadout, we recommend you run the DG-56 LS18 Barrel, Extended TP-9 Buttplate, Shadowstrike Suppressor, Varanus Steady Grip, and the Bruen Heavy Support Grip. This way, you’ll be off the radar and able to drop enemies with ease at almost any range. And yes, we mean almost any range. Due to the absurd TTK, you can actually beat out SMGs at close range if you can land your burst with a headshot. With surprisingly great iron sights, we find you don’t even need an optic, letting you get an extra, more statistically beneficial attachment.
Next comes the Vest, as this dictates the other slots open to us. The best choice in this case is the Gunner Vest. Importantly, the Gunner Vest lets us bring a second primary weapon, in this case, the WSP Swarm. That’s not all though, as we also gain improved reload speed and deploy with max ammo, though it does disable the Boots gear slot.
While the DG-58 will serve you well for most of the engagements you’ll find yourself in, we do recommend you bring a backup weapon with you, and what better than the WSP Swarm. In close range, it’s really only the WSP Swarm and the Rival-9 that can beat out the DG-58. Though the Rival-9 has more range, its TTK is slightly slower. That’s why we recommend the WSP Swarm instead, which has a blazing 230ms TTK, as we’ve got the DG-58 for anything outside of about 5m away. The WSP Swarm is the perfect backup for when things get a little hairy in CQC or when you’re out of ammo.
As for equipment, we recommend either a Breacher Drone or a Drill Charge. Both of these are superb for moving enemies out of safety and into the deadly three-round burst of our DG-58 loadout. Likewise, the age-old Stun or Flash Grenades are ideal tactical throwables for getting a leg-up. Last but not least, the Comm Scrambler Field Upgrade is perfect for carving out a zone of the map to control by limiting enemy intelligence within its radius. For objective-based modes, we also like the Portable Radar.
Next comes gear, which is crucial to the overall playstyle. We recommend the Marksman Gloves so that we can better land shots with the DG-58 at range. As a burst rifle, it’s important to miss as few shots as possible since the delay between bursts extends the TTK massively. With the Marksman Gloves reducing flinch, we can hit our first burst more easily under fire.
However, you could also use the Quick-Grip Gloves or the Assault Gloves if you’d rather play more aggressively. The former lets you swap weapons faster, which is great considering the purpose of the WSP Swarm in this MW3 best loadout as a panic sidearm. The latter lets you bunny hop, which isn’t ideal for the DG-58 but can still come in handy if you’re forced into close range, and the WSP Swarm benefits from it too.
Last up is the EOD Padding, which is almost a must-have considering how much grenade and explosive spam there is, particularly in objective modes like Hardpoint and Domination.
Holger 556 loadout
- Primary: Holger 556
- Secondary: RGL-80
- Vest: Overkill Vest/Demolition Vest
- Tactical: Stun Grenade/Flash Grenade
- Lethal: Breacher Drone/Drill Charge
- Field Equipment: Comm Scrambler
- Gloves: Marksman Gloves
- Boots: Lightweight Boots
- Gear: EOD Padding
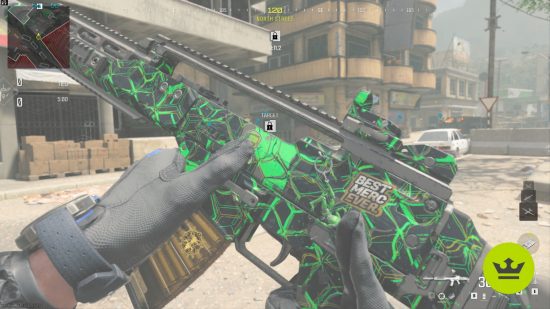
As our MW3 Holger 556 loadout guide covers, this assault rifle is also dominating the game right now due to its ease of use and appetizing time-to-kill (TTK). That’s why it’s among the list of the best MW3 loadouts, serving you well no matter what map or mode you’re doing battle in.
Starting with the Holger 556 itself, your best bet is to rein in the recoil and improve its range. Add a suppressor into the mix and you’ve got a very reliable and deadly silent weapon that’s great for flanking, contesting long sightlines, or anything else you’ll go up against.
This MW3 loadout gets even more interesting when you add the RGL-80 into the mix. Sure, it’s not an option for stealthy plays like the suppressed Holger, but it instead gives you more options for controlling the map and objective areas. In other words, it lets you lean into the strength of the Holger 556 as a powerful mid-range weapon.
When it comes to the Vest, we recommend the Overkill Vest. Since we’re rocking the RGL-80 – a secondary – we can’t use the Gunner Vest as this restricts you to two primary weapons. Meanwhile, the Overkill Vest gives you the choice of primary or secondary. Add to that the very useful effects it adds, namely the ability to reload while sprinting, and you’ll be much more mobile.
With that said, another fun setup is the Demolition Vest. This one isn’t exactly meta-defining but it works with the zone-controlling nature of this loadout. You’ll have access to all your gear slots (unlike the Overkill Vest that disables Boots) but you’ll also gain two charges of your lethal equipment. As the cherry on top, the Demolition Vest will recharge your equipment every 25 seconds. In other words, you’ll never be short on explosives to push enemies around, which synergizes nicely with the Holger 556
Our equipment of choice supports this playstyle too, with Stun and Flash Grenades giving you options to push enemies out of cover and into your volley of bullets. Likewise, the Breacher Drone and Drill Charges are similarly great at making your opponent move out of a fortified position – if they’re not already dead, that is.
Gear is also slightly different from the norm in this best MW3 loadout. Since we’ve got the RGL-80 for backup, we’re not prioritising weapon swap speed. As such, we recommend the Markman Gloves or even the Scavenger Gloves. By reducing flinch when aiming, the former is perfect for mid-range fights, where the Holger 556 already excels. The latter is helpful since you’ll be burning through ammo with both weapons, so you can instead pick up ammo from enemies. We do, however, like to stick to the Lightweight Boots as mobility and repositioning are ideal for this mid-range setup, though you won’t be able to equip Boots with our Vest of choice, so we’ve got two for you to choose from.
It’s also worth noting that the EOD Padding is even more important than usual since we’ve got an explosive secondary that’s quite easy to injure yourself with if you’re not careful. Other than that, it protects you from the inevitable grenade and explosive spam of multiplayer.
MCW loadout
- Primary: MCW
- Secondary: WSP Stinger/Striker
- Vest: Overkill Vest/Gunner Vest
- Tactical: Flash Grenade
- Lethal: Breacher Drone
- Field Equipment: Comm Scrambler/Dead Silence
- Gloves: Assault Gloves
- Boots: Covert Sneakers/Tactical Pads
- Gear: EOD Padding/Data Jacker
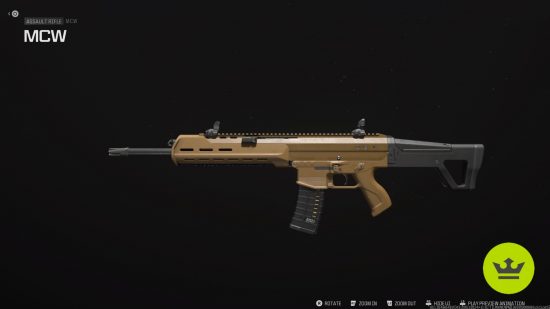
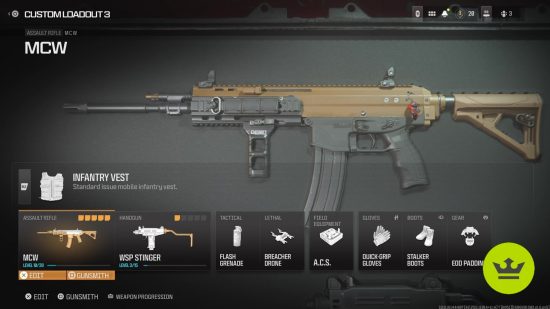
With a 290ms TTK and an effective damage range of nearly 27m, it’s no wonder the MCW has one of the highest usage rates in the game – it’s one of the most powerful and versatile weapons in the entire game. It helps that it’s also based on the iconic ACR, arguably the most popular weapon from the original MW2 (2009).
From our experience, attachments to optimize the MCW assault rifle for recoil control, range, and handling work best. In action, this means you’ll have a highly accurate, almost laser beam-like weapon, boasting incredibly high TTK in close to medium range that can also hold its own at longer ranges. Seriously, this weapon is a beast. We’ve no doubt this will be many players’ best MW3 loadouts for most modes.
As for what Vest to bring along, we recommend using the Gunner Vest while leveling up for its bonus ammo and reload speed, as well as the ability to use two primary weapons. Bear in mind, though, that you can’t use Boots with the Gunner Vest. However, this is less important with the MCW than it is with an SMG like the Rival-9, for instance.
Once you unlock the Overkill Vest, however, it’s a no-brainer. The Overkill Vest is ideal for very aggressive players like ourselves, as it increases reload speed and even lets you reload while sprinting. In effect, this lets you get the best effect of the Gunner Vest as well as the Commando Gloves. You’ll even be able to wield two primary weapons just like the Gunner Vest (or two secondaries). However, you will lose access to Field Equipment, though you’ll have access to Boots, unlike the Gunner Vest. For this MW3 best loadout, we think it’s a worthy trade-off given the great benefits of the Overkill Vest.
Outside of this, we recommend the Flash Grenade and Breacher Drone tactical and lethal items as these are great for pushing or flushing enemies out of cover. Given how adaptable the MCW is, it’s a perfect choice.
Likewise, you can’t go wrong with the Comm Scrambler Field Equipment to deny your enemies the intelligence they’ll need to take you down by disabling enemy communications such as UAVs within its radius. However, if you prefer to be more aggressive, then we recommend Dead Silence instead. This lets you dial up the offense by temporarily making your footsteps silent and applying the Ghost effect. Why does that matter? Well, it means you can easily flank the enemy to pick them off without them even knowing you’re there until it’s too late.
For the gear perks, the Assault Gloves and Covert Sneakers are by far the best options. Since we’re largely aiming for better range and stability on the MCW, we’ll naturally take a hit to mobility and handling. However, these items more than make up for it. If you’re using the Gunner Vest, remember that you will miss out on Boots, unfortunately.
Check out our MW3 MCW loadout for more details and alternative suggestions that might work better for you.
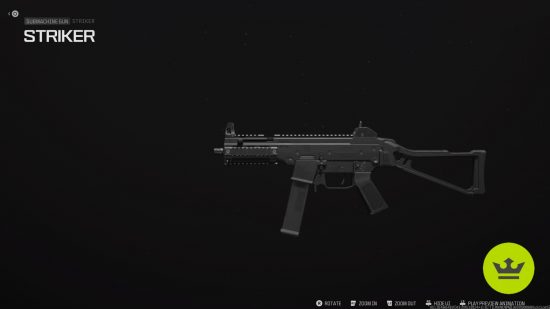
Striker loadout
- Primary: Striker
- Secondary: Renetti (JAK Ferocity Carbine Kit)/MCW
- Vest: Gunner Vest/Overkill Vest
- Tactical: Flash Grenade
- Lethal: Breacher Drone
- Field Equipment: Comm Scrambler/Dead Silence
- Gloves: Assault Gloves
- Boots: Covert Sneakers/Tactical Pads
- Gear: EOD Padding/Data Jacker
Ah, the Striker. If you’ve played for more than a few minutes, you’ve no doubt been killed by this feisty SMG already. Thanks to a blazingly quick 297ms TTK and great handling (which also helps at longer ranges), it’s not hard to see why it’s so popular. Indeed, we’ve had a lot of success with this weapon ourselves as its swift handling lets you pull off plays you otherwise would have missed.
Given the Striker is already a powerhouse in close range, we much prefer upgrading it with attachments that boost damage range. Say hello to the best MW3 Striker loadout, now upgraded with great range and recoil control that makes it a remarkably versatile SMG that will serve you well in most maps. With this best MW3 loadout at the ready, you’ll never need anything else.
Outside of choosing the Striker as the primary weapon in this loadout, the next biggest choice, however, is which Vest to use. Unlike the MCW loadout, there’s a much greater incentive to stick with the Gunner Vest, despite the added agility of the Overkill Vest. This is because the Gunner Vest still grants you access to Field Equipment like Dead Silence, which works really well with the Striker in our experience. Beware though, as the Gunner Vest does restrict access to Boots, which are also useful for mobility, like the Tactical Pads. On the other hand, the Overkill Vest returns access to Boots but disables Field Upgrades. Which one to pick will largely be up to your playstyle, though we generally prefer the Overkill Vest.
Whichever Vest you pick, you’ll have access to a second primary weapon. With the Striker dominating close-range fights and also pushing towards the mid-range, we recommend bringing a long-range weapon. For example, we like pairing it with the MCW or SVA 545 assault rifle, or even a sniper or marksman rifle. This ensures you’ll always be ready for anything.
If you’d rather use a different Vest entirely, such as the CCT Comms, then we recommend bringing the Renetti handgun with the JAK Ferocity Carbine Kit – one of the MW3 Aftermarket Parts – with you. While it’s not quite as effective as an assault rifle, marksman rifle, or sniper at range, it’s a handy backup weapon to have with you if you’re not using one of our two recommended Vests.
The Flash Grenade and Breacher Drone feature once again for much the same reason. Both are great for offensive and defensive plays, which is vital with this scrappy SMG setup.
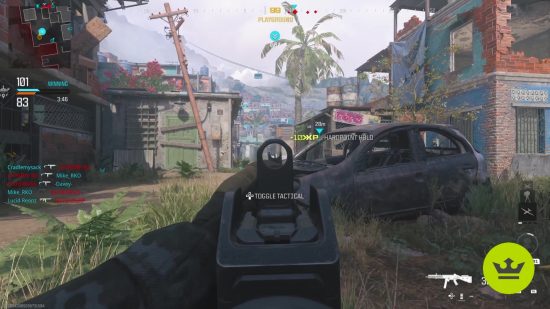
Likewise, we also recommend either the Comm Scrambler or Dead Silence depending on how aggressive you are. However, this SMG really does shine with Dead Silence due to how mobile you are, letting you wipe out a whole team of enemies before they know what’s hit them. This is especially true if you’re using the Shadowstrike Suppressor, a new attachment that hides you from the minimap with zero downsides to speak of.
As for gear, the Assault Gloves, Covert Sneakers, and either the EOD Padding or Data Jacker once again steal the spotlight. The Assault Gloves help to make the Striker more aggressive and effective in close range as our build generally pushes for more range. Likewise, the Covert Sneakers let us move around without being detected quite so easily, which is great for pulling off flanks. However, there are strong alternatives, such as the Quick-Grip Gloves and Tactical Pads if you’d rather.
Meanwhile, the EOD Padding lets us avoid an untimely death from all the explosions going off while the Data Jacker gives you everything you need to keep your streak going. Simply kill a foe and walk over them to get a ping of nearby enemies, giving you your next target for the hungry Striker.
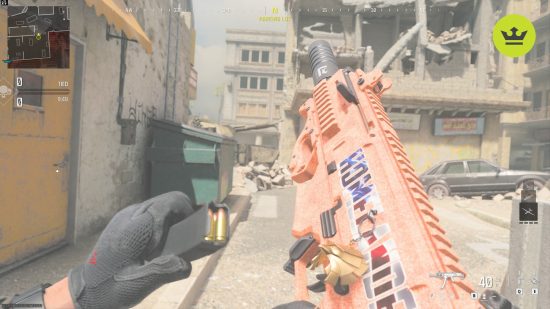
Rival-9 loadout
- Primary: Rival-9
- Secondary: MCW
- Vest: Gunner Vest/Overkill Vest
- Tactical: Battle Rage/Flash Grenade
- Lethal: Breacher Drone
- Field Equipment: Dead Silence
- Gloves: Assault Gloves
- Boots: Tactical Pads
- Gear: EOD Padding/Data Jacker
Boasting a swift 287ms TTK up to 10.2m, the Rival-9 is a true competitor to the Striker, largely thanks to its blazing rate of fire. The only downside is that it’s got some pretty intense recoil. Nevertheless, the best MW3 loadouts account for this.
Using attachments to better control the recoil, increase range, and a trusty suppressor, the Rival-9 feels much better to use. This lets you take full advantage of its absurd TTK value to even beat the WSP Swarm, Striker, or MCW in most close-range engagements. We told you it was strong.
The Vest is the toughest choice. The Rival-9 can’t really compete outside of close range simply due to its strong recoil, even with attachments helping it out. Thankfully, both the Gunner and Overkill Vests let you bring a primary backup to bolster one of the best MW3 loadouts.
However, you’ll have to weigh up which Vest you prefer. To make use of Dead Silence, which works extremely well with a suppressed Rival-9, you’ll have to opt for the Gunner Vest and forgo Boots. On the other hand, if you don’t use Field Upgrades often anyhow, then it’s better for you to choose the Overkill Vest instead for the added mobility and Boots slot.
It’s up to personal preference, though we generally prefer using the Gunner Vest in this case unless it’s one of the smaller MW3 maps like Rust where Dead Silence isn’t as effective anyhow.
Because of how deadly this weapon is in close range, we think it’s best to go all-in on this playstyle. Using Battle Rage, you can effectively power yourself up in a fight so you’re more likely to come out on top. However, you could swap this for the age-old Flash Grenade to help push enemies as well, though the Breacher Drone works well for this too.
Continuing this theme, we recommend taking advantage of Dead Silence to go on a rampage behind enemy lines, especially since we’re using a suppressor. We’ve had a lot of fun flanking teams in objective game modes and clearing the objective with this beast of an SMG. This also works incredibly well with the Data Jacker gear item to ping nearby enemies so you know who’s next on your hit list.
We recommend using the Assault Gloves and Tactical Pads since the Rival-9 is undoubtedly a close-range weapon that needs added mobility. However, the Commando Gloves or Lightweight Gloves are another good option if you’re not using the Overkill Vest.
Check out our MW3 Rival-9 loadout for even more recommendations and information on the best setup for this popular SMG.
Longbow loadout
- Primary: Longbow
- Secondary: Rival-9
- Vest: Overkill Vest
- Tactical: Flash Grenade/Stun Grenade
- Lethal: Frag Grenade
- Field Equipment: N/A
- Gloves: Marksman Gloves
- Boots: Stalker Boots
- Gear: EOD Padding/Bone Conduction Headset
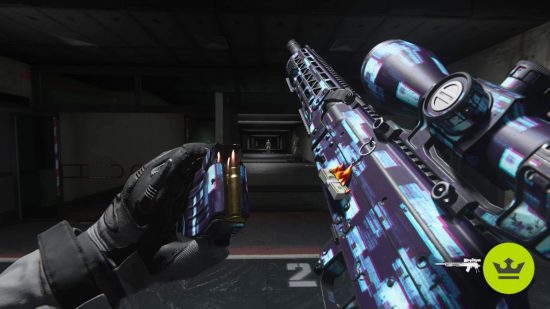
Sniping isn’t for everyone, but it’s hard to deny just how effective it is in Call of Duty. With snipers able to one-shot foes to the upper body at almost any range, they’re deadly in the right hands. Thankfully, the best MW3 Longbow loadout makes it easier than ever by having an incredibly slick and easy-to-use sniper that sacrifices longer-range effectiveness for up-close scrappiness. We loved it way more than we ever expected to and ended up Gilding it not long after we first picked it up.
Starting with the Longbow itself, you will need attachments that boost aim down sight speed and sprint to fire speed at all costs, including reducing the massive magazine size, removing the stock, and adding a laser. What you’re left with is a deadly one-hit weapon that’s so quick to aim that you’re able to beat out everything from SMGs to assault rifles and marksman rifles, as long as you can land that one all-important shot – though the fast rechambering speed often affords you a second chance even if you miss. All in all, it’s a powerful yet much more forgiving and approachable sniper for those looking to dip their toes in.
As for the rest of the loadout, we recommend using the Overkill Vest. Besides the handy ability to reload while running, which is useful in staying on the move with a bolt-action sniper, you’ll also be able to bring a backup primary weapon. In this case, we recommend something like the Rival-9 or WSP Swarm for those really close-quarters moments when a sniper can be a bit finicky.
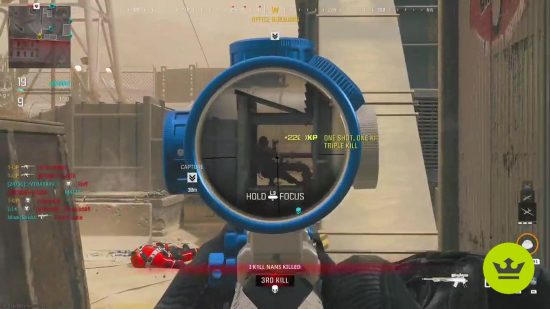
The classic Stun/Flash Grenade and Frag Grenade combo works wonders with the Longbow, letting us move enemies around the battlefield and hopefully into our sights. However, the Scatter Mine and Claymore work if you’re a more stationary player.
When it comes to your gear Perk options, there are two that stand out above the rest – the Marksman Gloves and Stalker Boots. Given we’re primarily using a sniper, you can’t do much better than these. The Marksman Gloves reduce sway and flinch while aiming, letting us land the one shot we need to down our opponent even when under pressure. On the other hand, the Stalker Boots increase strafe speed and ADS movement speed so we’re more agile when firing, which is also great for dodging bullets like Neo. Otherwise, the Assault Gloves and Tactical Pads are also a fun combination for aggressive players.
Finally, we have the Gear item. For this slot, we recommend either EOD Padding or the Bone Conduction Headset. As we’ve mentioned already, explosions are everywhere in MW3 multiplayer. What makes it even more of a pain is that we’re less agile and have a more obscured view when aiming our sniper than with something like an SMG, making it harder to escape the blast. EOD Padding solves this issue by reducing the damage dealt by non-Killstreak explosives. Conversely, the Bone Conduction Headset ensures no one can sneak up on us by improving the identification of footsteps and gunshots.
MTZ-556 loadout
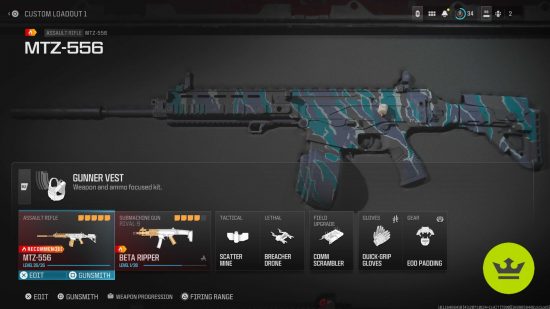
- Primary: MTZ-556
- Secondary: WSP Swarm
- Vest: Overkill Vest
- Tactical: Flash Grenade/Stun Grenade
- Lethal: Breacher Drone
- Field Equipment: N/A
- Gloves: Assault Gloves
- Boots: Covert Sneakers
- Gear: EOD Padding/Bone Conduction
The MTZ-556 assault rifle is certainly one of the best MW3 loadouts right now thanks to just how aggressive you can be while also having the range advantages of an assault rifle; it’s no wonder why this weapon has a high pick rate.
With a fast fire rate and low recoil when tuned with the right attachments, the MTZ-556 is a beast at close to mid-range. But what are the right attachments? Well, from our experience, you want to focus on reining in the recoil without hurting mobility and handling too much. This way you’ll be in a much better position to take advantage of the high rate of fire and TTK stat thanks to better handling and recoil control, particularly pushing more into the mid-range and slightly beyond. Check out our MW3 MTZ-556 loadout to learn more.
Next, we recommend the Overkill Vest. We like the added aggression the Overkill Vest offers through the increased reload speed and ability to reload while sprinting (gaining the effects of the Commando Gloves and Quick-Grip Gloves, effectively). This item is key in keeping your enemies on the back foot as you don’t even need to stop to reload anymore. Perhaps most importantly though, you’ll also be able to bring a second primary weapon, which can be useful if you need an SMG like the WSP Swarm or a long-range backup weapon like the Longbow. Unfortunately, this will disable our Field Upgrade slot.
While we recommend the Overkill Vest, if you’d rather use something else, such as Gunner or Demolitionist, then it’s worth knowing what Field Upgrade to bring just in case. Because of how deadly you can be when staying on the move with this weapon, we’ve found great success pairing it with Dead Silence, especially since we’re using the Shadowstrike Suppressor to hide on the minimap. Given the fast TTK, you’ll quickly rack up kills to extend the duration if you play smart. With that said, the Comm Jammer is also great if you’re looking to hold a specific position or lane, such as in modes like Hardpoint or Domination, though the A.C.S can also be a lot of fun in these modes too.
The tried and true Flash Grenade and Breacher Drone appear yet again, reinforcing their place in the meta thanks to how versatile they are. Whether you’re looking to push enemies, flush them out of cover, or even give yourself an escape route, you can’t go wrong with these equipment options. However, we’ve also had a lot of fun pairing this with the Scatter Mine to weaken foes foolish enough to push us.
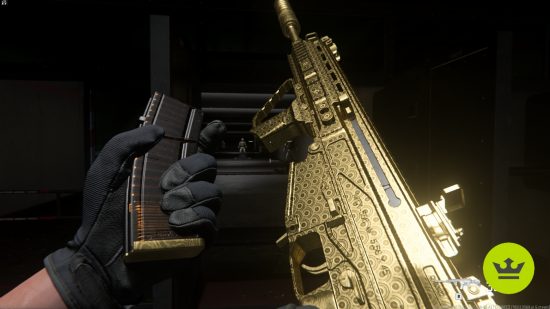
As for gear perks, we recommend the Assault Gloves and Covert Sneakers, especially as the Commando and Quick-Grip Gloves are covered by our Vest choice, which would otherwise be great alternatives. Combined, these let you stay on the offensive and outmaneuver opponents without being detected so easily, setting yourself up for prime takedowns with the scrappy MTZ-556.
We love pairing this with the Bone Conduction Gear item to be able to catch out enemies that we’re foolish enough to think they could flank, especially with how prevalent Covert Sneakers are. However, you also can’t go wrong with EOD Padding, especially in objective-based modes where grenade and explosive spam is through the roof. The Data Jacker is another fun option, letting you gain insight into the enemies’ positions after we gain kills and pick up the device they drop.
How are the best MW3 loadouts affected by Season 1?
Season 1 brings with it a suite of new tools that will shake up the best MW3 loadouts, from brand-new weapons to new Aftermarket Parts and gear. While it’s likely the loadouts above will stay in the meta for quite some time to come, you can expect a few new arrivals and small tweaks.
For example, there are five new weapons and nine new Aftermarket Parts. While these won’t all take a spot among the best MW3 loadouts for most players, there’s a handful that sticks out. The RAM-7 assault rifle is the biggest highlight, going head-to-head with the meta MCW and MTZ-556 assault rifles. Likewise, the HRM-9 SMG rivals the Striker for its close to mid-range effectiveness. We fully expect these two weapons in particular to feature in our list of the best MW3 loadouts.
Similarly, the JAK Ettin Double Barrel Kit that turns the AMR9 into a double-barreled beast could finally land this mid-range SMG a spot among the best MW3 loadouts.
It doesn’t stop there though, as there’s also the new Assassin Vest. Stealthy flank plays will always rule in CoD, and the Assassin Vest is purposefully designed with this in mind. Removing the skull visual when killing an enemy and making you immune to UAV and enemy radar (even when stationary), the Assassin Vest will no doubt become the meta option. It helps that you can still equip the full suite of gear, including Boots and Gloves, so all you’ll be missing is a Field Upgrade. With how powerful and well-rounded this Vest is, the best MW3 loadouts are getting a makeover in Season 1.
Well, that covers all the best MW3 loadouts right now based on our own experience crushing the leaderboard. However, there are so many more MW3 guns to use if you’d rather – including all the rebalanced MW2 weapons. With this much variety and items to unlock, we’ve no doubt MW3 is primed to take a spot on our best FPS games list. However, you really should have the best PS5 controllers and best Xbox controllers if you want to truly dominate, as some even come with extra buttons that help speed things up in combat.
