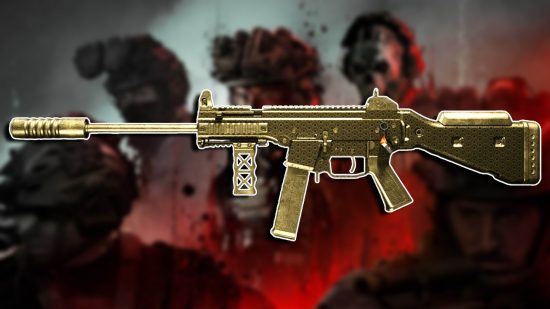
What is the best MW3 Striker loadout in Season 1? The Striker was the star of the show during the beta but was tuned down quite significantly for launch. However, its time in the spotlight has returned with several SMGs, most significantly the Striker, getting a buff. With the best MW3 Striker loadout, you’ll be able to dominate lanes, push objectives, and drop foes with lethal rapidity in close-range combat. So, here’s the full Striker build and class setup for multiplayer.
Call of Duty MW3 Striker is one of the most reliable weapons in the MW3 meta right now, and we’ve loved leveling it up to max weapon level. After countless hours with the gun, tuning it in the firing range and tweaking it to perfect, our MW3 Striker loadout makes it one of the best MW3 guns and best MW3 loadouts in multiplayer during Season 1. In fact, it was one of the main builds we used while playing for our MW3 review, so we’ve had plenty of time with this iconic SMG.
Best MW3 Striker loadout
The best MW3 Striker loadout is:
- Muzzle – Shadowstrike Suppressor S
- Barrel – Striker Recon Long Barrel
- Underbarrel – SL Skeletal Vertical Grip
- Stock – FSS Priority Tactical Stock
- Ammunition – .45 Auto Hollowpoint
The Striker has been one of our favorite weapons ever since the beta period due to how versatile and adaptable it is, and that hasn’t changed in MW3 Season 1 despite new weapons and maps. Need to shred at close range? Bring the Striker. Need to stand a chance at mid-range? Once again, bring the Striker. It’s easily the most balanced SMG of the bunch, lending itself well to the remastered maps that feature both incredibly tight alleyways and sprawling fields to cross. It’s great news then that the Striker is unlocked at level 4, right as you gain access to class customization. In other words, it’s the starting SMG, though don’t be fooled into thinking it’s only a stepping stone to stronger weapons.
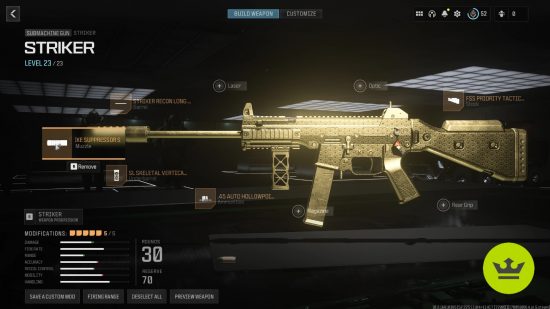
Starting things off with perhaps the most important attachment for any of the MW3 guns, given the classic red dot minimap has returned, is the Shadowstrike Suppressor S. There’s a reason nearly every loadout uses this attachment and that’s because it’s a suppressor with no downsides. Unlike other muzzles, this Shadowstriker Suppressor S will simply hide you from the radar when firing, with no negatives or further advantages. While this is our preferred muzzle for this MW3 Striker loadout, the Sonic Suppressor S is a close contender. This will hide you from the map too, but it also adds bullet velocity and range at the cost of aim walking steadiness, sprint to fire speed, and recoil control. If you’re looking to eke out more ranged damage and don’t mind the slight hits to responsiveness, then this is your best option.
Next up in this MW3 Striker build is the Striker Recon Long Barrel. This attachment increases bullet velocity and range, as well as aiming idle sway (though that’s not important here), which helps you compete at longer ranges. Since the Striker is already an accurate weapon, able to land consecutive shots with ease, added ranged effectiveness is worthwhile. This does, however, come at the expense of hipfire and Tac Stance spread, sprint to fire speed, and aim walking speed. These bumps to overall mobility and handling aren’t insignificant, though we can make up for it elsewhere. If you’re looking for a more scrappy, CQC build, then we recommend you take the Striker Stubby Barrel instead, which effectively has the opposite effect of the Recon Long Barrel.
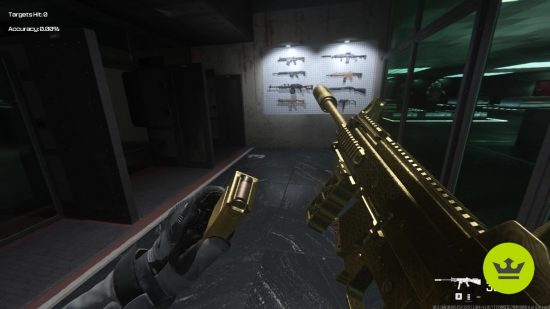
For the underbarrel attachment, we’ve opted for the SL Skeletal Vertical Grip, which not only helps to rein in the vertical recoil of the weapon, but also makes up for the downsides of the barrel with improved aim down sight speed and sprint to fire speed. Unfortunately, hipfire and Tac Stance spread will be further decreased, though it will still serve you well in close-range fights anyhow, even in Tac Stance.
As for the stock, we love using the FSS Priority Tactical Stock to increase accuracy and recoil control, while also improving movement speed and sprint speed. It might not sound like much but it’s the perfect set of buffs for a versatile SMG like the Striker which can excel at close and mid-ranges. With that said, the RB Crotalus Assault Stock is a close second for its improved aim down sight speed and sprint to fire speed, though we find its negative impact on hipfire and Tac Stance spread, recoil control, and movement speed too noticeable. Nevertheless, try it out for yourself and you might find it suits you better.
Last but not least, the .45 Auto Hollowpoint ammunition brings this MW3 Striker loadout together. This ammo removes enemy skulls when you kill a foe so opponents won’t know an ally just died nearby. Most importantly though it adds crippling power which is perfect for throwing your enemy off their game the moment you shoot them. With a versatile SMG that can hold its own in close and mid-range fights, you really can’t do any better than this. Furthermore, the slight hit to bullet penetration is negligible as SMGs lack bullet penetration anyhow.
Though we find the crippling power of the .45 Auto Hollowpoint to be an invaluable effect in combat, you might find it unnecessary. If you don’t want to run different ammunition, then you’ve got a slot to play around with. We recommend checking out either the 40 Round Mag, your favorite optic, or a laser to increase responsiveness in close range.
So, with the best MW3 Striker loadout and build complete, you now have a well-balanced SMG that’s capable of agile plays in close quarters, as well as outgunning other SMGs and even assault rifles at mid-range. With a sub-297ms time-to-kill (TTK) at up to 19m (post-patch), the Striker is one of the deadliest weapons in multiplayer after its buffs.
Now all you need is an optimal Striker class setup and you’ll be ready for anything the game throws at you.
MW3 Striker class setup
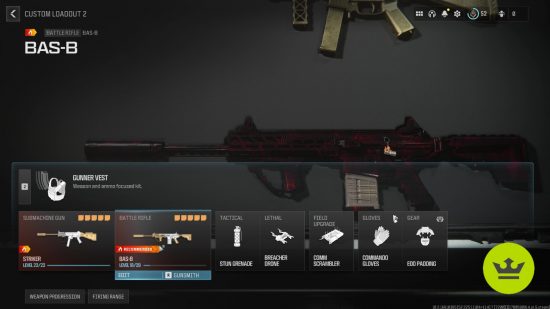
The best MW3 Striker class setup is:
- Vest – Overkill Vest
- Secondary – BAS-B
- Tactical – Stun Grenade
- Lethal – Breacher Drone
- Field Upgrade – N/A
- Gloves – Assault Gloves
- Boots – Covert Sneakers
- Gear – EOD Padding
Since the Striker build has everything covered in CQC, and even out into the mid-ranges, we need a backup weapon that can handle further ranges. This requires us, first of all, to take the Overkill Vest. Though the Gunner Vest will also let you carry two primary weapons, we prefer the increased weapon swap speed and ability to reload while sprinting over the improved reload speed and max ammo upon spawn in this case. However, both work incredibly well. The biggest difference is that the Overkill Vest denies access to Field Upgrades, whereas the Gunner Vest locks access to Boots, the latter of which is more impactful.
With the Overkill Vest, you can now bring the dependable BAS-B battle rifle with you alongside the Striker. The BAS-B is one of the strongest weapons in the meta right now thanks to how potent it is at all ranges. In our MW3 BAS-B loadout, we’ve decked it out for better recoil control. This means we can swiftly deal with foes looking to pick us off from afar if we can’t close the gap to get within the Striker’s effective range. It’s also just absurdly good right now and can beat out most weapons even at close range despite how big it is. Fans of snipers, you could even bring along the XRK Stalker, the Season 1 sniper.
As a side note, MW3 Season 1 adds the Assassin Vest which is another great pick for the best Striker loadout in MW3. By removing the skull indicator when killing an enemy and making you immune to UAV and enemy radar effects, the Assassin Vest is designed with flanking in mind. With the close to mid-range effectiveness of the Striker, this playstyle works very well indeed. On the suite of remastered maps, we prefer the Overkill Vest to bring a dependable long-range weapon, but on the smaller arenas introduced in Season 1, Assassin takes the cake.
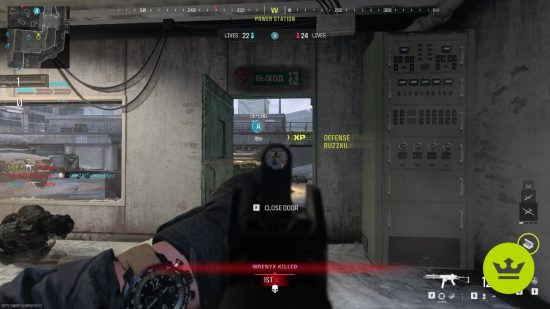
Next up in this MW3 Striker loadout are the tactical and lethal options. We love using the Stun Grenade and Breacher Drone to apply pressure to our enemies so we can charge on in behind. After all, we are using the swift Striker. If you’re yet to use the Breacher Drone, you’ll also be surprised by how much range this explosive has. See an enemy holding a long sight line? Simply let this drone loose and it will fly directly towards them. If it doesn’t kill them outright, they’ll either have to flee their position or be injured so you can finish them off with the Striker. It’s a win-win, right?
Since we’re using the Overkill Vest, we unfortunately don’t have access to Field Upgrades. However, another Striker build we enjoy is to run the Gunner Vest or CCT Comms Vest and pair it with the Comm Scrambler or Dead Silence. The Comm Scrambler is ideal to deny the enemy the leg-up on us. Within the radius of the Comm Scrambler, enemies won’t be able to call in Killstreaks and their intel systems, such as UAVs, will be ineffective. This not only denies them intel but can also give them a false sense of security which you can take advantage of. On the other hand, Dead Silence is perfect for getting your sneak on and flanking the enemy. With how versatile the Striker loadout is, it’s hard to get in too deep and be outmatched if you’re playing around cover.
We can, however, choose Boots thanks to the Overkill Vest. There are two great choices when it comes to Boots, so you won’t be shoehorned into a specific playstyle. First up, and our main recommendation, are the Covert Sneakers. These slick shoes spice up the action by quieting your footsteps, letting you move around the map without giving your position away through walls and even floors. Remember, we’re already using the Shadowstrike Suppressor to hide from the minimap, so why let your clumsy feet give you away? You’d be surprised just how much enemies rely on sound to know where you’re coming from, so when you deny them that it makes it much easier to catch them out.
However, we also like using the Tactical Pads from time to time. On smaller maps like Rust where stealth isn’t all that possible (or simply for players that prefer a more head-on approach), the Tactical Pads work wonders. These let you slide around the map swiftly while still maintaining accuracy. Sliding in general is a great way to throw off your enemies’ aim, and the Tactical Pads let you take advantage of that. So, slide, slide, slide, soldier!
As for Gloves, we’ve opted for the Assault Gloves so we can jump (and slide thanks to the Tactical Pads) around the arena without sacrificing accuracy. This works particularly well on small MW3 maps or objective-based MW3 modes like Hardpoint where we can constantly stay on the move. Sure, it’ll no doubt infuriate the enemy having to fight a slippery soldier jumping and sliding around every corner, but that’s part of the fun, isn’t it?
If you’re not using the Overkill Vest, then the Commando Gloves are a great alternative. These allow you to reload while sprinting, effectively giving us a benefit of the Overkill Vest while still letting us use the Gunner Vest – the best of both worlds.
Lastly, you can’t beat the EOD Padding Gear option. There’s plenty of Gear to choose from, though it’s hard to take off the EOD Padding once you’ve given it a go. The luxury of being able to survive all the grenades and explosive spam in the meta right now can’t be understated.
If you can part with the EOD Padding, however, the Bone Conduction Headset is very useful indeed. Just like how we’re using the Covert Sneakers, your enemies no doubt love it too – it’s a meta Boot option after all. The Bone Conduction Headset effectively counters Covert Sneakers by making enemy footsteps and gunshots easier to identify.
MW3 Striker alternatives
While the Striker is the best all-around SMG, sacrificing extreme close-range effectiveness for more mid-range effectiveness, there are several alternatives that are worth checking out if you’re not a fan.
The most obvious alternative to the Striker is the Striker 9. This 9mm version of the powerful SMG adds even more ranged effectiveness but further reduces close-range potential. Since it’s effectively the same weapon, the Striker and the Striker 9 feel very similar to use.
If you’re looking for an alternative that sets itself apart from the Striker a little more, then we recommend the Rival-9. With the best MW3 Rival-9 loadout, you’ll be able to absolutely eviscerate foes at close range as this SMG has one of the best TTK values in the entire game. Likewise, the WSP Swarm has the second-best TTK in the game, the best of the SMGs, though a very limited 4.6m effective range.
Likewise, the HRM-9 from Season 1 is a light yet stable SMG boasting a high fire rate and mobility. It’s a good compromise, landing between the Striker and the Rival-9.
With the better mid-range effectiveness of the Striker, there are also a number of assault rifles that could be better suited to your playstyle, including the best MW3 MTZ-556 loadout, the MW3 MCW loadout, and the RAM-7 which arrived in MW3 Season 1. These have less range than your average assault rifle but they make up for it by being much more aggressive ARs that compete in close and mid-range engagements. If you enjoy the Striker’s playstyle but struggle with the limited range of SMGs in general, then these would be your best bet.
That covers the best MW3 Striker loadout, build, and full class setup to be able to dominate in one of the best FPS games out there. With how troublesome many are finding the MW3 SBMM, even before the addition of MW3 ranked, you’re going to need it. While you might have your own twist on the build, our extensive testing in the firing range and matches has made our Striker build work wonders in the MW3 multiplayer modes, even becoming one of our favorite weapons overall. Now all you need to do is get your mitts on one of the best PS5 controllers or best Xbox controllers to dance around the arena wiping the scoreboard.
