
The Destiny 2 The Coil activity is a brand-new activity in Season of the Wish, building on the successes of Deep Dives and Altars of Summoning to offer one of the most fun and challenging experiences in the game. As a result, you’re no doubt wondering how to beat The Coil in Destiny 2, as well as all the rewards available and bonus objectives you can complete. Luckily for you, we’ve put ourselves through the gauntlet as soon as we could and have emerged to tell the tale.
If you’re yet to play the new Destiny 2 The Coil activity for yourself, then you’ll no doubt be taken by surprise at just how challenging The Coil can get and the stakes involved, though that’s what makes it a fun time. So, suit up with the best Destiny 2 Titan build, Destiny 2 Hunter build, and Destiny 2 Warlock build because it’s time to beat The Coil and earn some of the new Destiny 2 Season of the Wish weapons in the process.
Destiny 2 The Coil explained
The Coil in Destiny 2 is a challenging new three-player seasonal activity in Season of the Wish that tasks players with completing multiple rounds of combat, platforming, and boss fights to reach the end. In practice, it’s a much longer and more advanced version of Riven’s Lair, with purchasable upgrades and more, though you should expect to spend around an hour to beat it.
There are up to four stages in The Coil, with each stage getting progressively more difficult as you progress into the activity. The first stage begins at -5 Power, meaning enemies will always be five levels higher than you. Each stage afterwards adds another -5 Power effect up to a maximum of -20 Power in the fourth and final stage. In other words, you can expect Master and Grandmaster difficulty content by the end.

This is important as The Coil has a revive limit as well. While it is fairly generous, and more revives can be purchased using the currency you collect during the activity, if you run out of lives, then it’s game over. That’s right, you’ll be sent back to Orbit and miss out on more loot. Thankfully, you’ll be rewarded with a chest at the end of each stage and you can find bonus chests along the way, so you won’t go home empty-handed if you can’t beat it.
Due to the extra challenge in The Coil, we recommend venturing in with a group of friends or at least a pre-made Fireteam. While it’s certainly possible to beat it by queueing up with randoms, it is undoubtedly a much harder and messier experience than you’d like.
As for the stages themselves, The Coil consists of four ‘pathways’, which in turn include four separate encounters and a boss fight. This is where the relation to Riven’s Lair comes into play, as that activity is effectively one pathway of The Coil without any of the added mechanics and difficulty.

How to beat Destiny 2 The Coil
To beat The Coil in Destiny 2, you must complete the four pathways without running out of lives. This will entail you and your other two Fireteam members working together to clear out mobs, complete platforming sections, smash pots to earn Fused Wishing Glass shards, and defeat the bosses.
During the platform sections, you’ll have to do more than just reach the end of the course. Not only are there enemies firing at you while you jump around, but you’ll also have to locate three glowing pads to activate the portal to leave the platforming sections. This requires you to explore the area and stand on each plate once you’ve found it. While searching the area, keep your eyes peeled for pots and hidden chests. These pots contain the majority of the Fused Wishing Glass shards you’ll need to bag a high score at the end, purchase upgrades from Riven between each pathway, and to also unlock the hidden bonus chests – more on this later.
As for the combat encounters, this generally involves killing waves of enemies. Since you’re limited on lives and the difficulty is amped up in The Coil, we recommend playing it slow and steady rather than going in guns blazing. It’s also worth noting that while the enemies you defeat do drop Fused Wishing Glass shards, it’s very little compared to the amount you find in the pots. This makes locating and smashing the pots during the platforming sections paramount as you can’t make up for the loss simply by defeating enemies. Why does this matter? Well, it’s not just for the high score, remember, as your score also gates access to the hidden bonus chests.
Last up are the boss encounters, which finish each pathway. These bosses aren’t anything new so the boss mechanics aren’t all that unusual by Destiny’s standards. With that said, each boss does require you to know their unique mechanic to be able to beat them.

Destiny 2 The Coil bosses
The Destiny 2 The Coil bosses so far are:
- Locus of Subjugation
The bosses you face in The Coil are expected to change on a weekly basis, so expect to see different faces as time goes on. However, we’ve encountered one of them so far.
How to beat the Locus of Subjugation
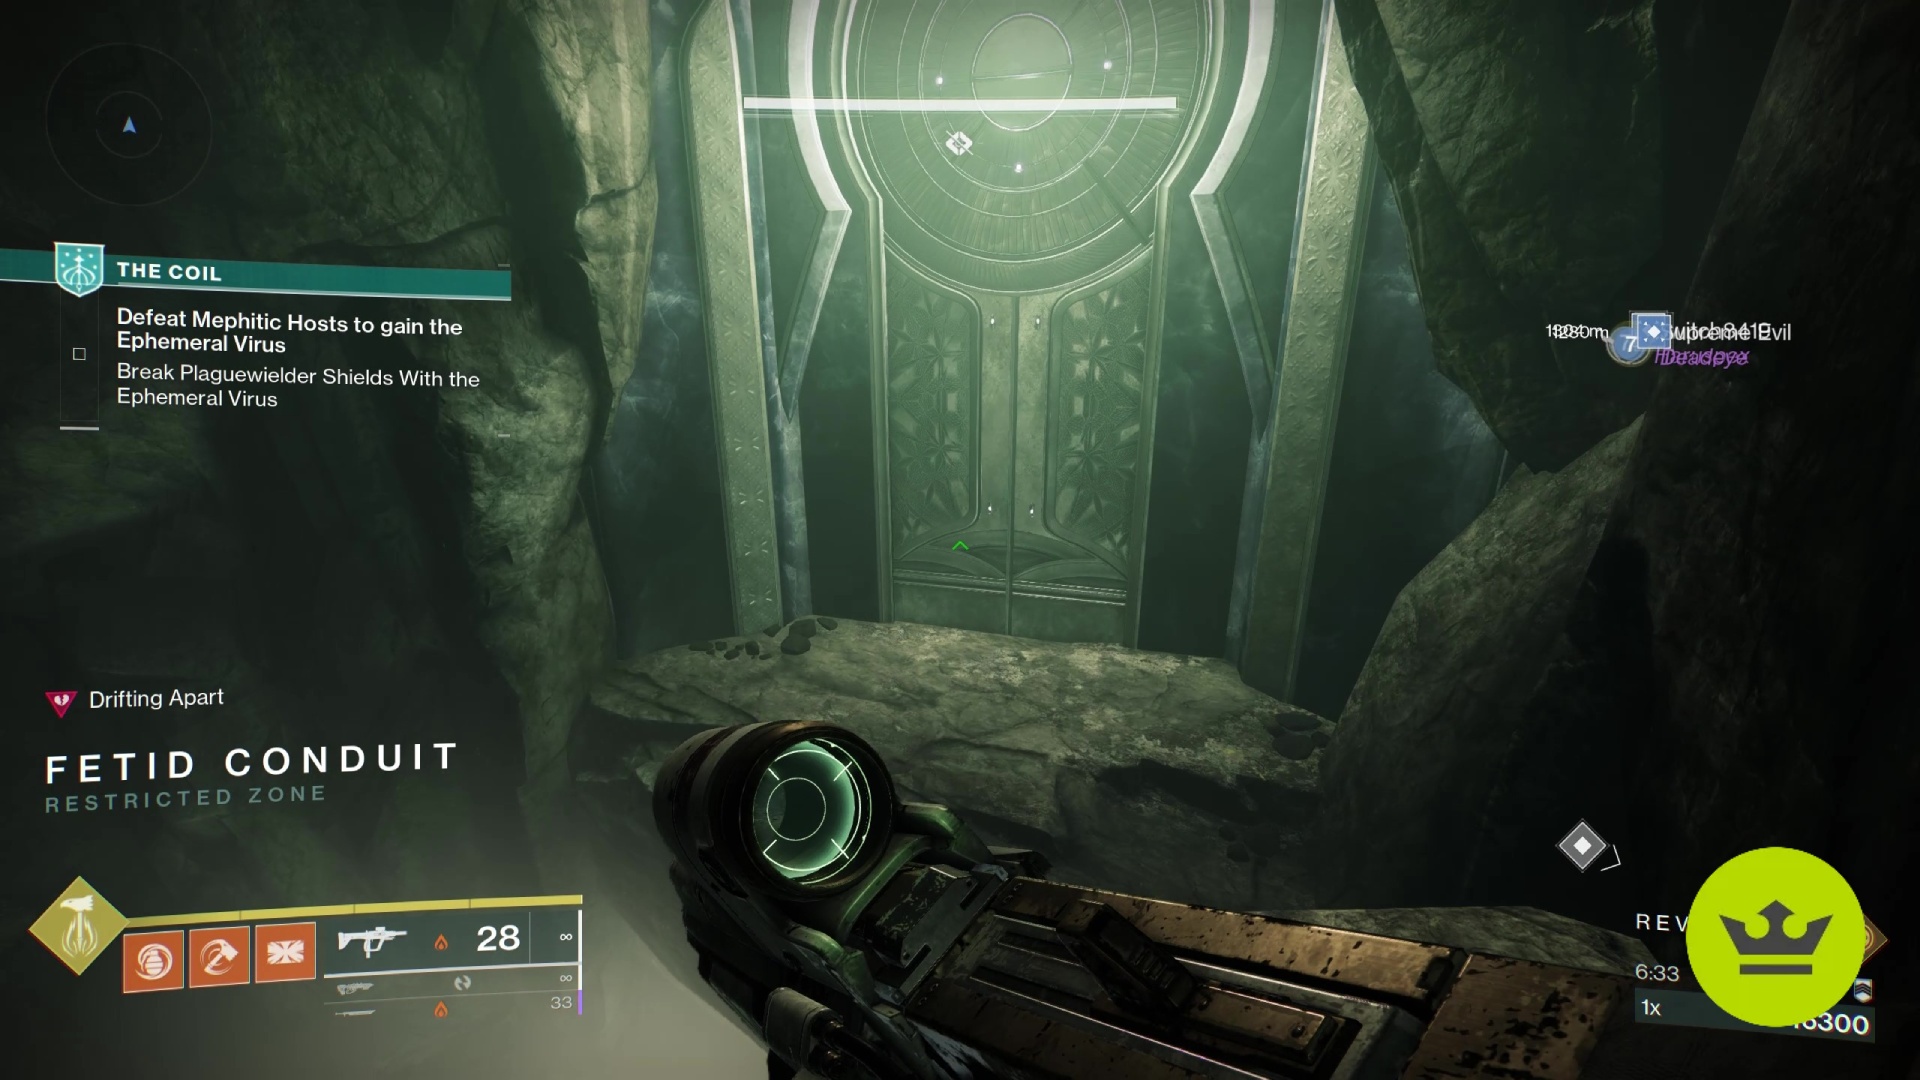
The Locus of Subjugation is arguably the most confusing of the bosses in The Coil, at least until you know how to beat them. In this boss fight, you will have to avoid dying at the hands of a poison effect.
This requires you to kill three yellow-bar enemies known as Mephitic Hosts and collect the orb they drop, granting you a stack of the Ephemeral Virus buff. Once you’ve got three stacks you’ll be able to damage the Plaguewielder standing on a central plate just behind the boss. Once defeated, this plate will glow, letting you stand in it to cleanse the creeping poison.
As for how to kill the Locus of Subjugation boss, you will use the Ephemeral Virus buff to take down their shield and be able to damage them.
Destiny 2 The Coil secret chest locations
The Destiny 2 The Coil secret chest locations are:
- Splintered Geode – to the far right of the first plate, near the entrance
- Splintered Geode – in the back right of the area, hidden behind a cleansing plate
- Splintered Geode – in a small archway at the top of the far right wall
- Fetid Conduit – to the left of the second plate, in the middle of the platforming area
- Fetid Conduit – in a cave to the right of the exit teleporter, near the third plate
- Fetid Conduit – in a small archway below the path in the second room
Each platforming section includes one bonus chest, meaning there will be a total of four bonus chests to find each run. Remember, to be able to open the hidden chests you will need a high enough score, with each chest getting progressively more demanding. If you don’t start collecting shards right away, then it’s unlikely you’ll be able to get any of the bonus chests as there’s not enough Fused Wishing Glass to be able to catch up if you’ve missed some pots.
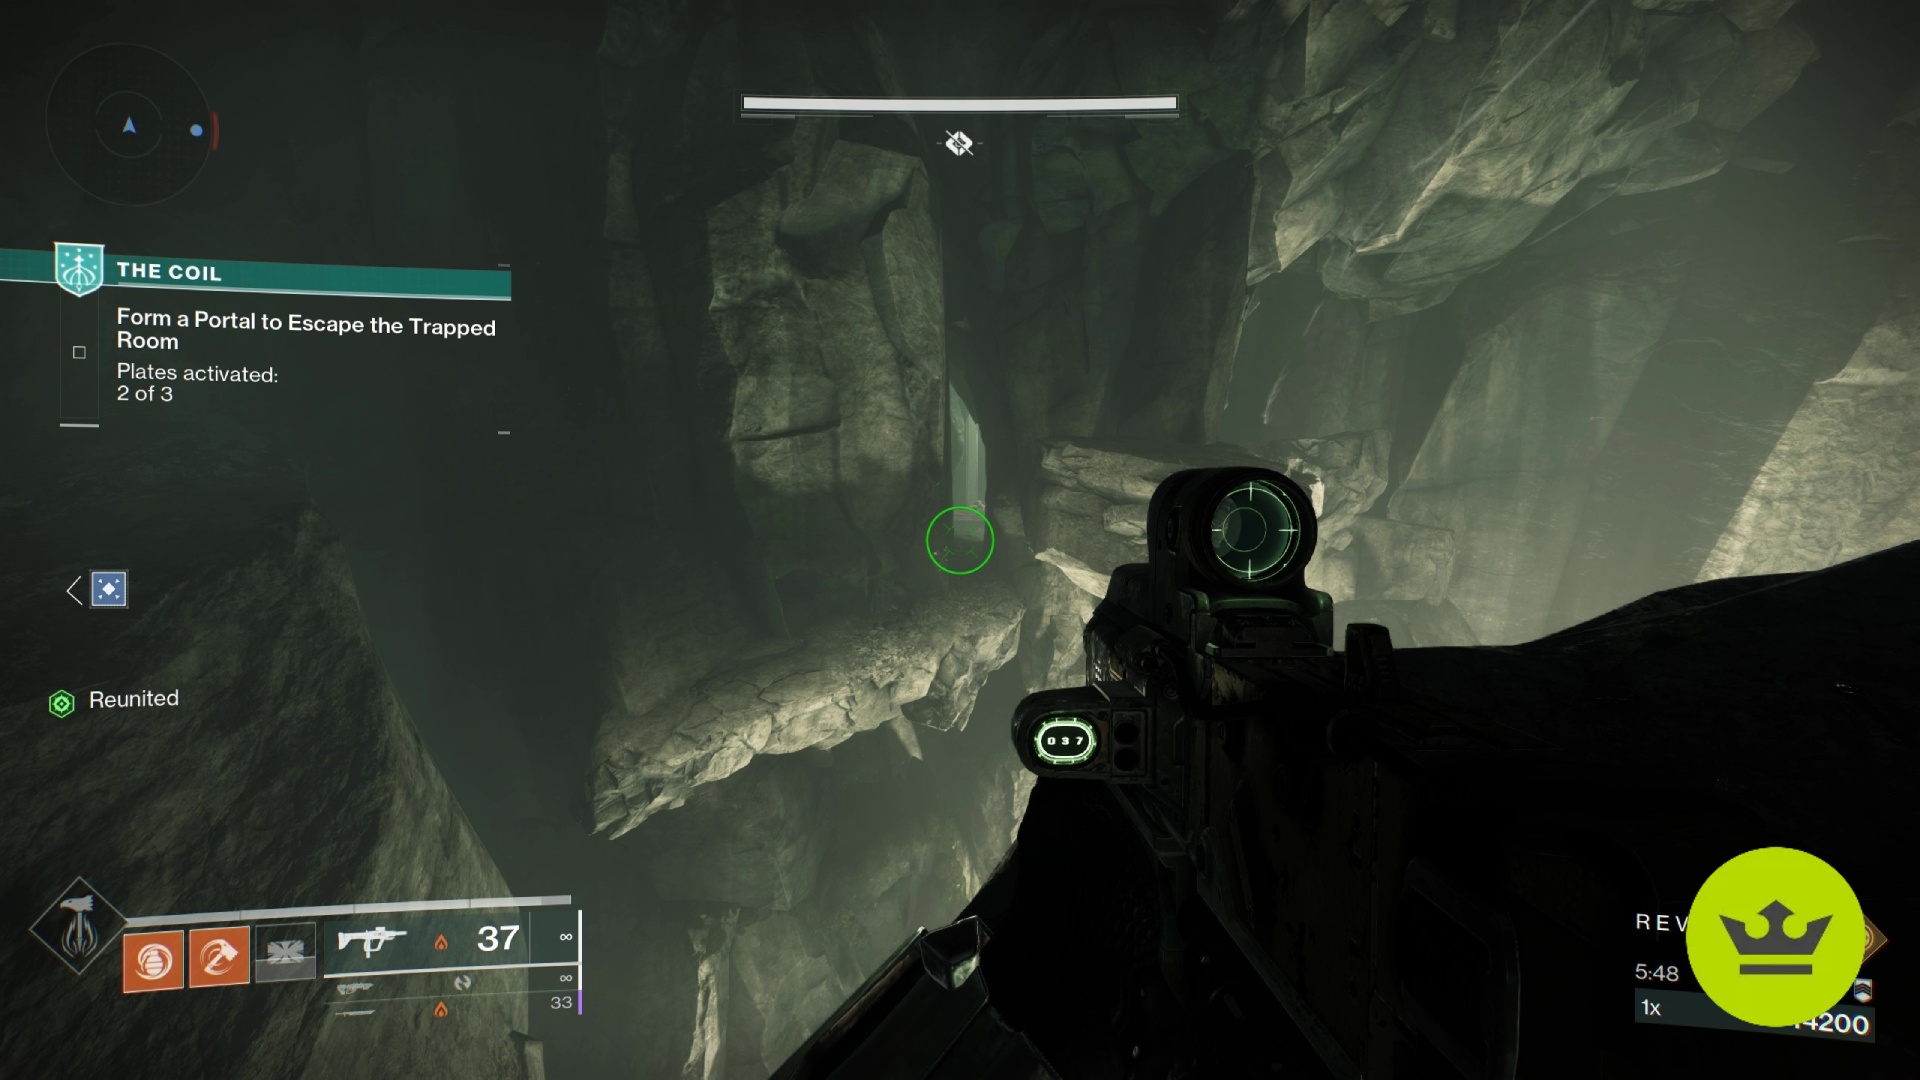
If you’re having trouble finding the hidden chests in The Coil, then we recommend you put a chest finder Mod on your Ghost. This will give you a marker on your screen when you are close to a chest, letting you know you’re on the right track.

Destiny 2 The Coil loot table and rewards
The Destiny 2 The Coil loot table and rewards are:
- Supercluster
- Scatter Signal
- Appetence
- Lethophobia
- Scalar Potential
- Doomed Petitioner
- Retold Tale
- Tigerspite
- Waking Vigil
- Vouchsafe
- Twilight Oath
- Sleepless
Remember, the amount of rewards you can earn depends on how far you make it. Successfully completing a pathway with grant you a chest next to Riven. So, you’ll get loot along the way but you will miss out on the final big chest if you’re unsuccessful.
As for the quality of the rewards, they’re certainly good. The handful of new and reprised weapons are generally worth chasing, and you’ll have plenty of loot drops through playing The Coil, even more so if you come out victorious. However, it’s a shame that there are not more unique rewards up for grabs considering how challenging the mode is, like a new armor set, an Exotic, or a different pool of Legendary weapons. The rewards you’ll get for completing The Coil, although plentiful, can also be earned elsewhere in the game, including the much easier Riven’s Lair activity. If you’re just looking to dip your toes in and get some loot, we recommend that activity instead. If you’re up for a challenging gauntlet and want to be showered with loot, then The Coil is for you.
Nevertheless, that’s all you need to know to be able to beat the Destiny 2 The Coil activity in Season of the Wish and, hopefully, crawl out with plenty of loot from the bonus chests. It’s a very fun mode that builds upon the successes of previous Season’s activities, further solidifying why D2 is one of the best FPS games in our eyes. If you’re looking to upgrade your setup, we can’t recommend the best PS5 controllers and best Xbox controllers enough, and they’re sure to come in handy when taking down the Witness.