
Should you defend the Lodge or go to the Eye in Starfield? The Starfield High Price to Pay main mission is one of the most significant in the space RPG’s narrative, and gives you an almost impossible decision to make. If you’re reading this, then it’s clear that you want to make sure you know all the outcomes of these choices so you don’t later regret the one you opt for. So, here are all the outcomes for the Starfield defend the Lodge or go to the Eye choice during High Price to Pay.
This is one of the most intense and important Starfield missions of the Xbox RPG game’s story, with significant stakes. In fact, the very fate of your Starfield companions are on the line, with your decision to defend the Lodge or go to the Eye making all the difference. Obviously, we’ll be spoiling the outcomes of this decision – you’ve been warned. Check out our Starfield review to find out more about the ambitious RPG and how it fares.
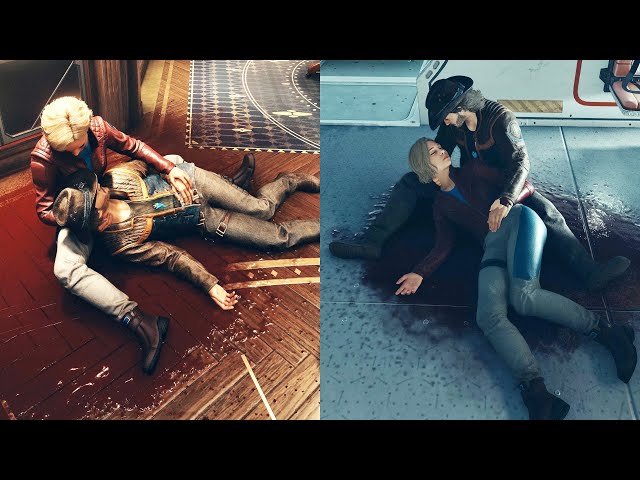
Starfield defend the Lodge or go to the Eye
In Starfield’s High Price to Pay mission, defending the Lodge will result in the death of a character at the Eye, while going to the Eye will lead to a character death at the Lodge. Regardless of your choice, one character will die based on your relationship level with your companions.
The characters that can die are:
- Andreja
- Barrett
- Sam
- Sarah
The character that will die will be, firstly, based on your decision of what to do. From there, the character killed will be the one you have the strongest relationship with. This means that you are guaranteed to lose one of the two companions you have the best relationship with.
To sway the decision in your favor, take note of the companions that are with you are the Lodge, and which two are at the Eye. You can then work out which characters will be killed with either decision, based on who you’ve been interacting with the most.
For example, if you’d like to save Sarah, first find out which location she is at. Then, pick this location to save them. However, this will result in the death of a companion in the other location.
That’s right, the characters that are in each location will vary depending on your relationship and which companion you have with you, so the best decision for each player will be different.
The best choice in High Price to Pay, therefore, is based on which character you would like to save, and which you would be willing to sacrifice, as this is the only outcome that changes based on your actions. Whichever character dies will be removed from the story for the rest of your playthrough.
If you want to see an example of how each of the choices can play out, check out this video below by ‘Ruba’:
Starfield High Price to Pay choices
The Starfield High Price to Pay choices are:
- Defend the Lodge
- Go to the Eye
You can only make two choices during this quest, and each will result in a character’s death. With the Hunter hot on your tail, there are grave consequences for this decision. You’ll have to weigh up your relationships with each character, as well as how to deal with the threat of the Hunter who is on their way to the Lodge after having already paid the Eye a visit. Read on to find out more about each of the outcomes.

Defend the Lodge outcome
Choosing to defend the Lodge will result in a companion dying at the Eye. With this choice, you will be defending the Lodge from the Hunter to protect the artifacts that gave you Starfield powers during the narrative. This begins by protecting Walter, who gets taken captive by the Hunter.
Once you’ve held off the Hunter, you’ll make a break for your ship to escape the Lodge and head to the Eye, where you will find out a character has died.

Go to the Eye outcome
Choosing to go to the Eye will result in a companion dying at the Lodge. Picking this option will see you leaving the Lodge, with one of the companions barricading the door behind you to keep the Hunter at bay.
Once you have reached the Eye, you will have to check on everyone aboard the station, where everyone will be injured. However, you will then be sent back to the Lodge to make sure everyone there is safe, only to find out that one companion here has died. Unfortunately, barricading the door behind you was not enough to keep the Hunter out.
Can you save everyone in Starfield High Price to Pay?
No, it is unfortunately not possible to save everyone in the Starfield High Price to Pay mission. With a binary option of either defending the Lodge or going to the Eye, one companion will always die. To add even more pain, it will also always be one of the two companions you’ve bonded with the most.
That means you’re going to have to make a decision on who to save, and who to sacrifice. However, we recommend saving the game before making your decision. This way, you can reload your previous save if you are unhappy with the outcome. After all, having your favorite character dead for the rest of the playthrough is quite a hit. However, thanks to Starfield New Game Plus, you can always make a different decision in the next playthrough.
And that’s all you need to know about the Starfield High Price to Pay mission, as well as whether you should defend the Lodge or go to the Eye in Starfield. Given you’ll have to fight the Hunter if you stay at the Lodge, be sure to have the best Starfield weapons at the ready, just in case.
Even if you don’t have the best of the best to hand, ensure you’ve at least got one of the unique Starfield weapons, as well as some of the best Starfield armor to make the encounter that bit easier. Making sure you have the best Starfield skills locked in is a further measure you could take if you’re attempting it on higher difficulties.
Still looking for more? While a good Starfield wiki can be a handy source of information, our new Starfield Database goes further, offering you daily news, searchable databanks, and even interactive tools.