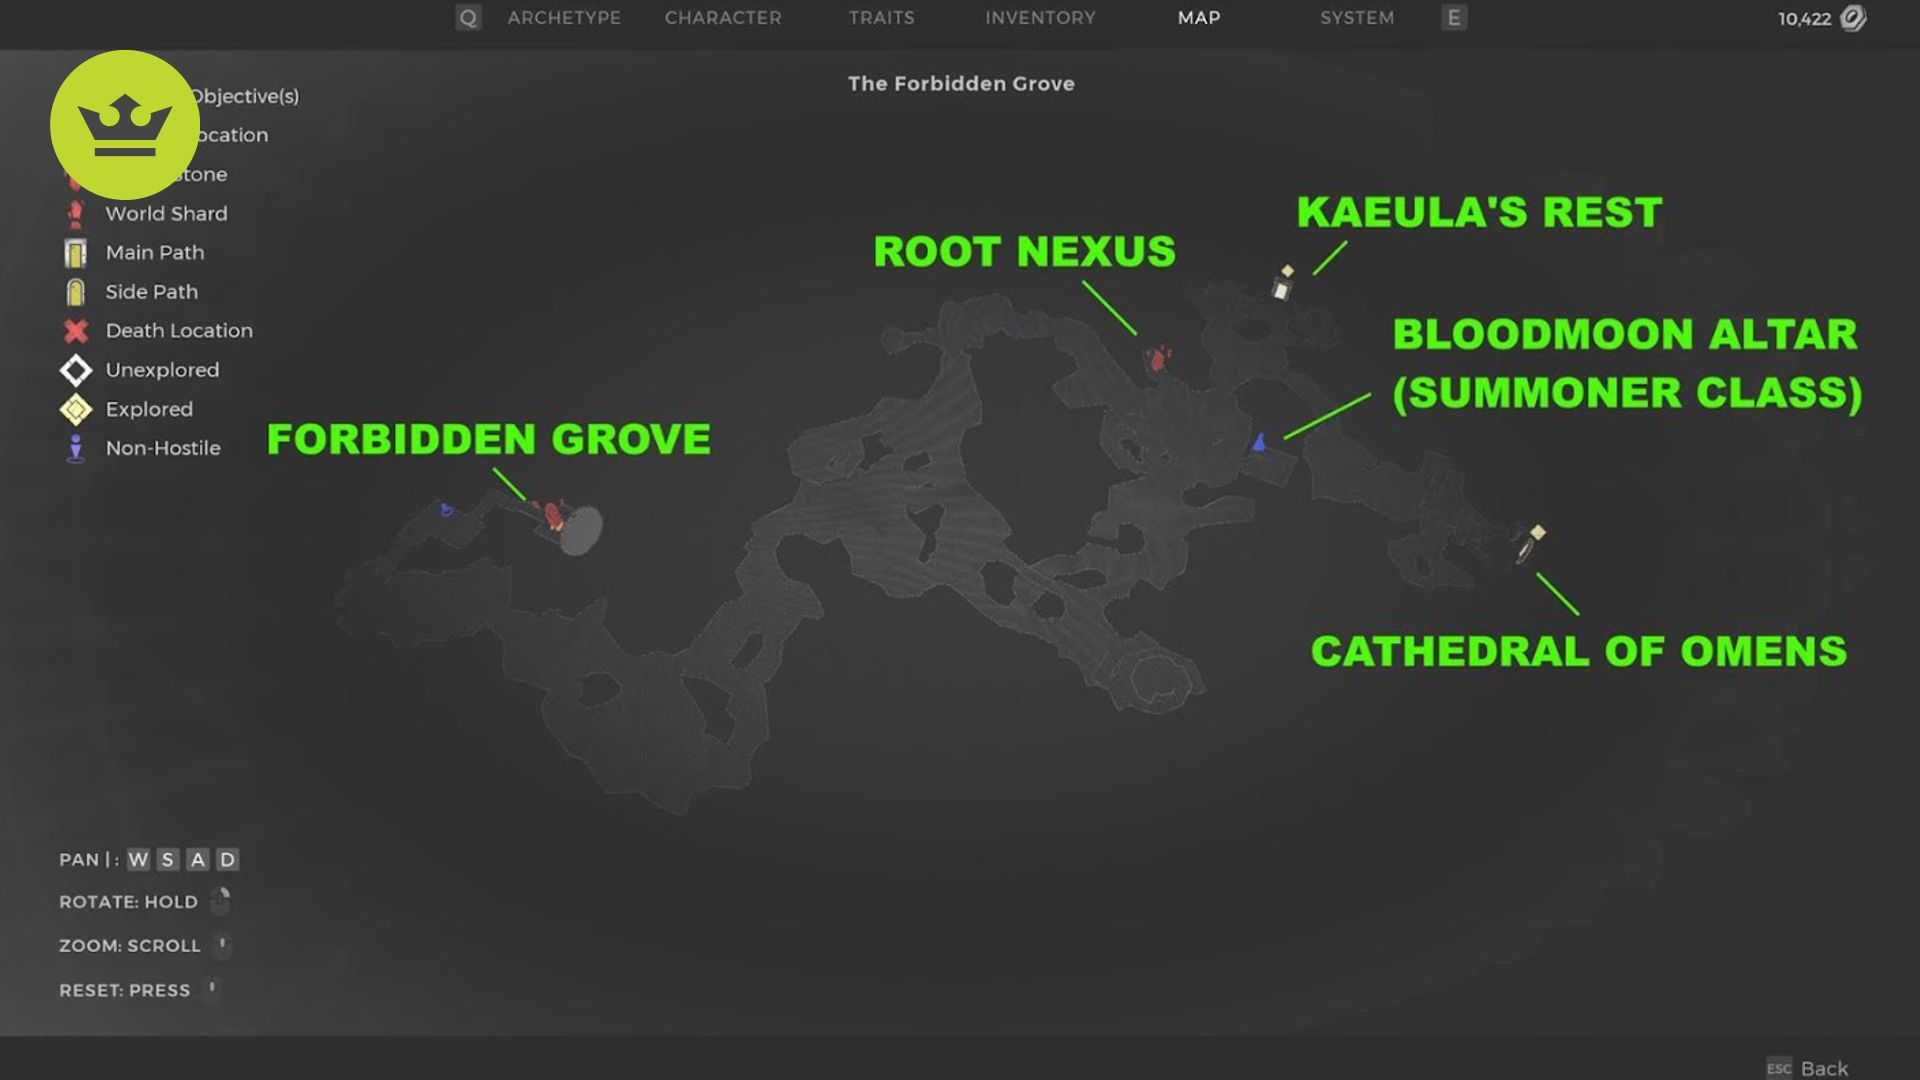
How do you solve the Remnant 2 Cathedral of Omens puzzle? Seeing as that’s the question you’re undoubtedly asking yourself right now, we’ve got your back as this Remnant 2 Cathedral of Omens puzzle guide discusses how to reach this area in Yaesha, the relevant clues, and the solutions for the Calamity, Blood Moon, and Hope diagrams.
This RPG game is packed full of puzzles and mysteries, and after playing for several dozen hours for our Remnant 2 review we have found this solution. With several zones and dungeons to explore in Remnant 2, you’re likely to come across some brain teasers along the way, such as the Remnant 2 Cathedral of Omens. While the initial area is filled with Root-infested enemies, the dungeon itself is completely devoid of hostiles. It’s just you, the puzzle, and your wits.
How to complete the Remnant 2 Cathedral of Omens puzzle
The Cathedral of Omens puzzle in Remnant 2 can be solved by matching the triangular pattern and symbols in the room using the shadows with the diagrams in the notebook. You will need to form three shapes: The Calamity, The Blood Moon, and The Hope.
Below, we talk about what each clue or passage pertains to so you know more about how we solved the Remnant 2 Cathedral of Omens puzzle in our own playthrough.
Inside this ruined temple, you’ll see a large diagram on the floor as well as three levers. Assuming you’re standing close to the entrance corridor, these levers rotate the following features:
- Middle (close to the entrance) – Rotates two circles that are opposite each other; forms a triangular pattern.
- Left (close to the open room) – Rotates two adjacent circles.
- Right (close to one of the locked rooms) – Rotates the symbols on the floor.
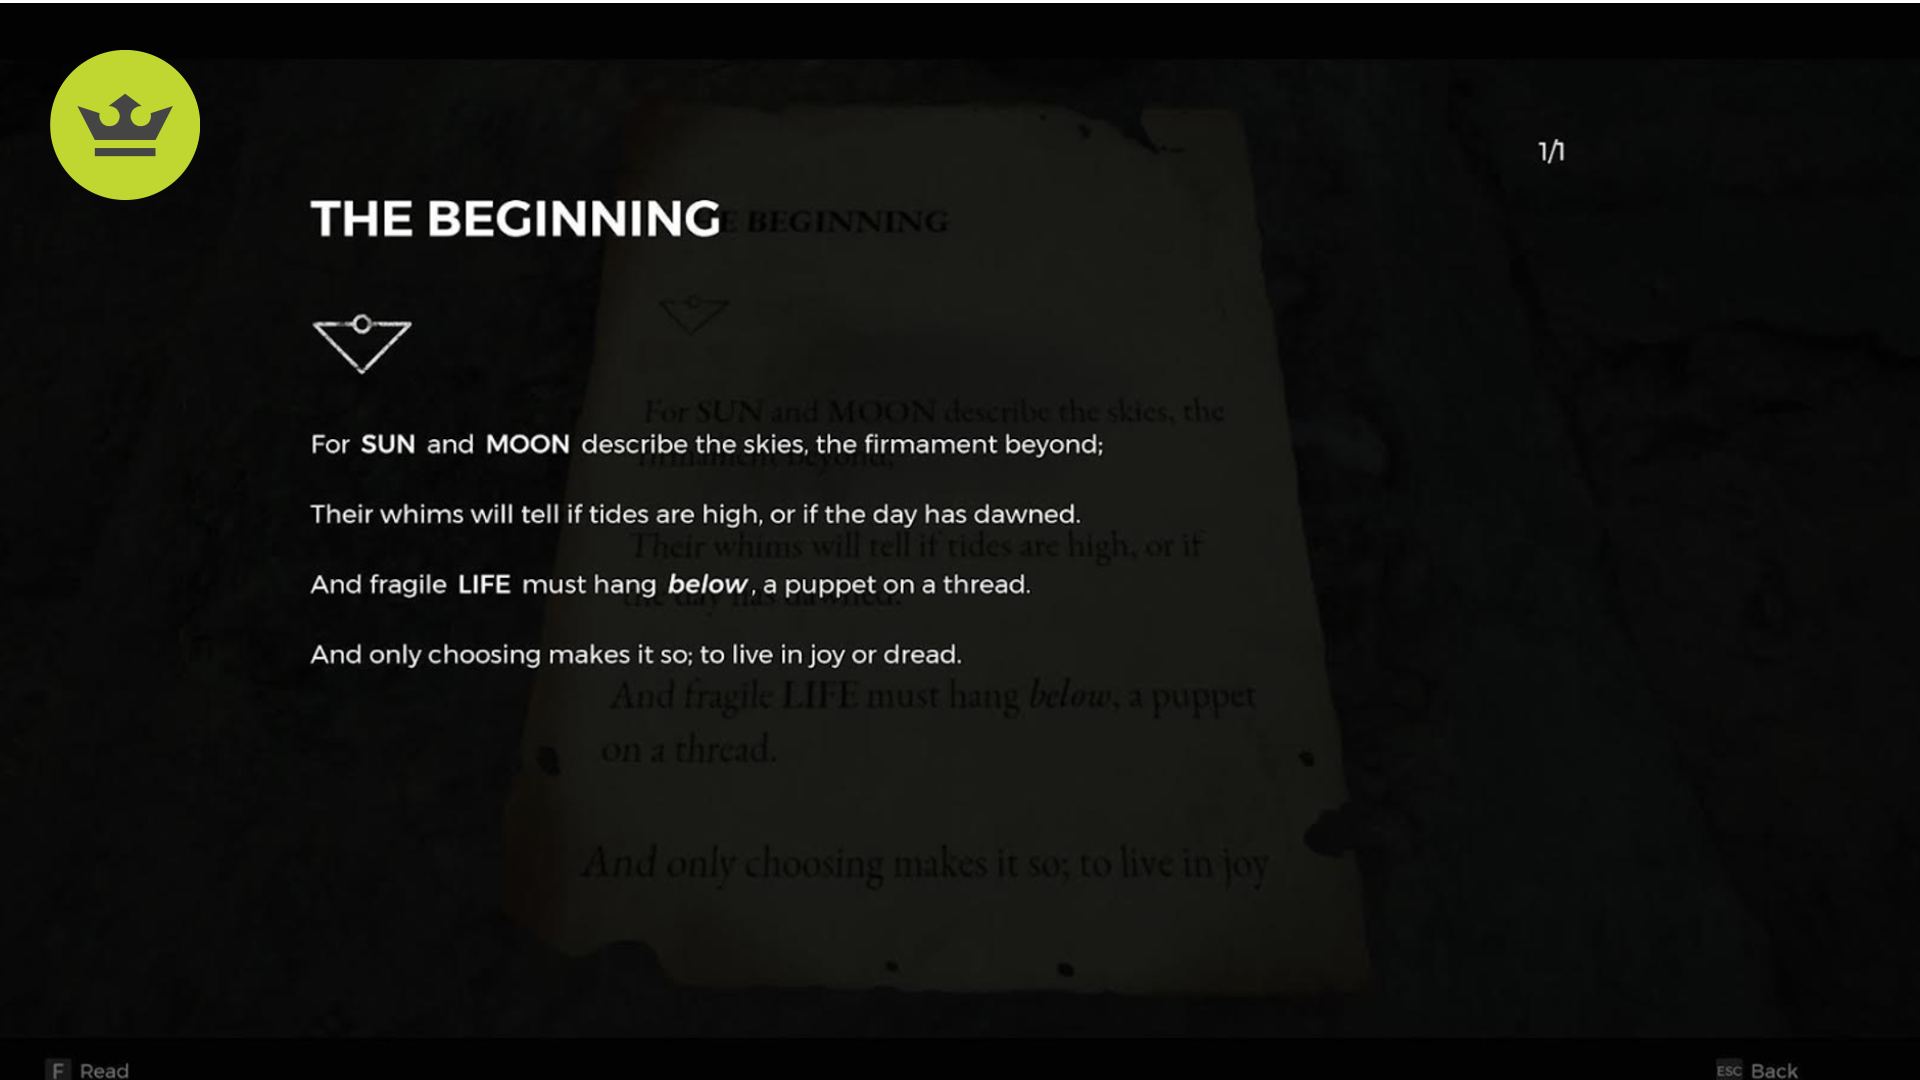
Now, if you check the room to your left, you’ll learn about The Beginning diagram, with these important tidbits: Sun, Moon, and Life (below). the triangle is pointing downward.
Next, if you take a look at the pattern on the floor, you’ll realize that it already corresponds to The Beginning diagram itself. That means all three symbols are encircled, and the Life symbol is in the lower portion. This gives you an idea as to how the Cathedral of Omens puzzle is solved.
Begin by heading to the room atop the stone steps. Inside, you’ll find another document. This one has even more symbols and diagrams: The Calamity, The Blood Moon, and The Hope.
The Calamity solution
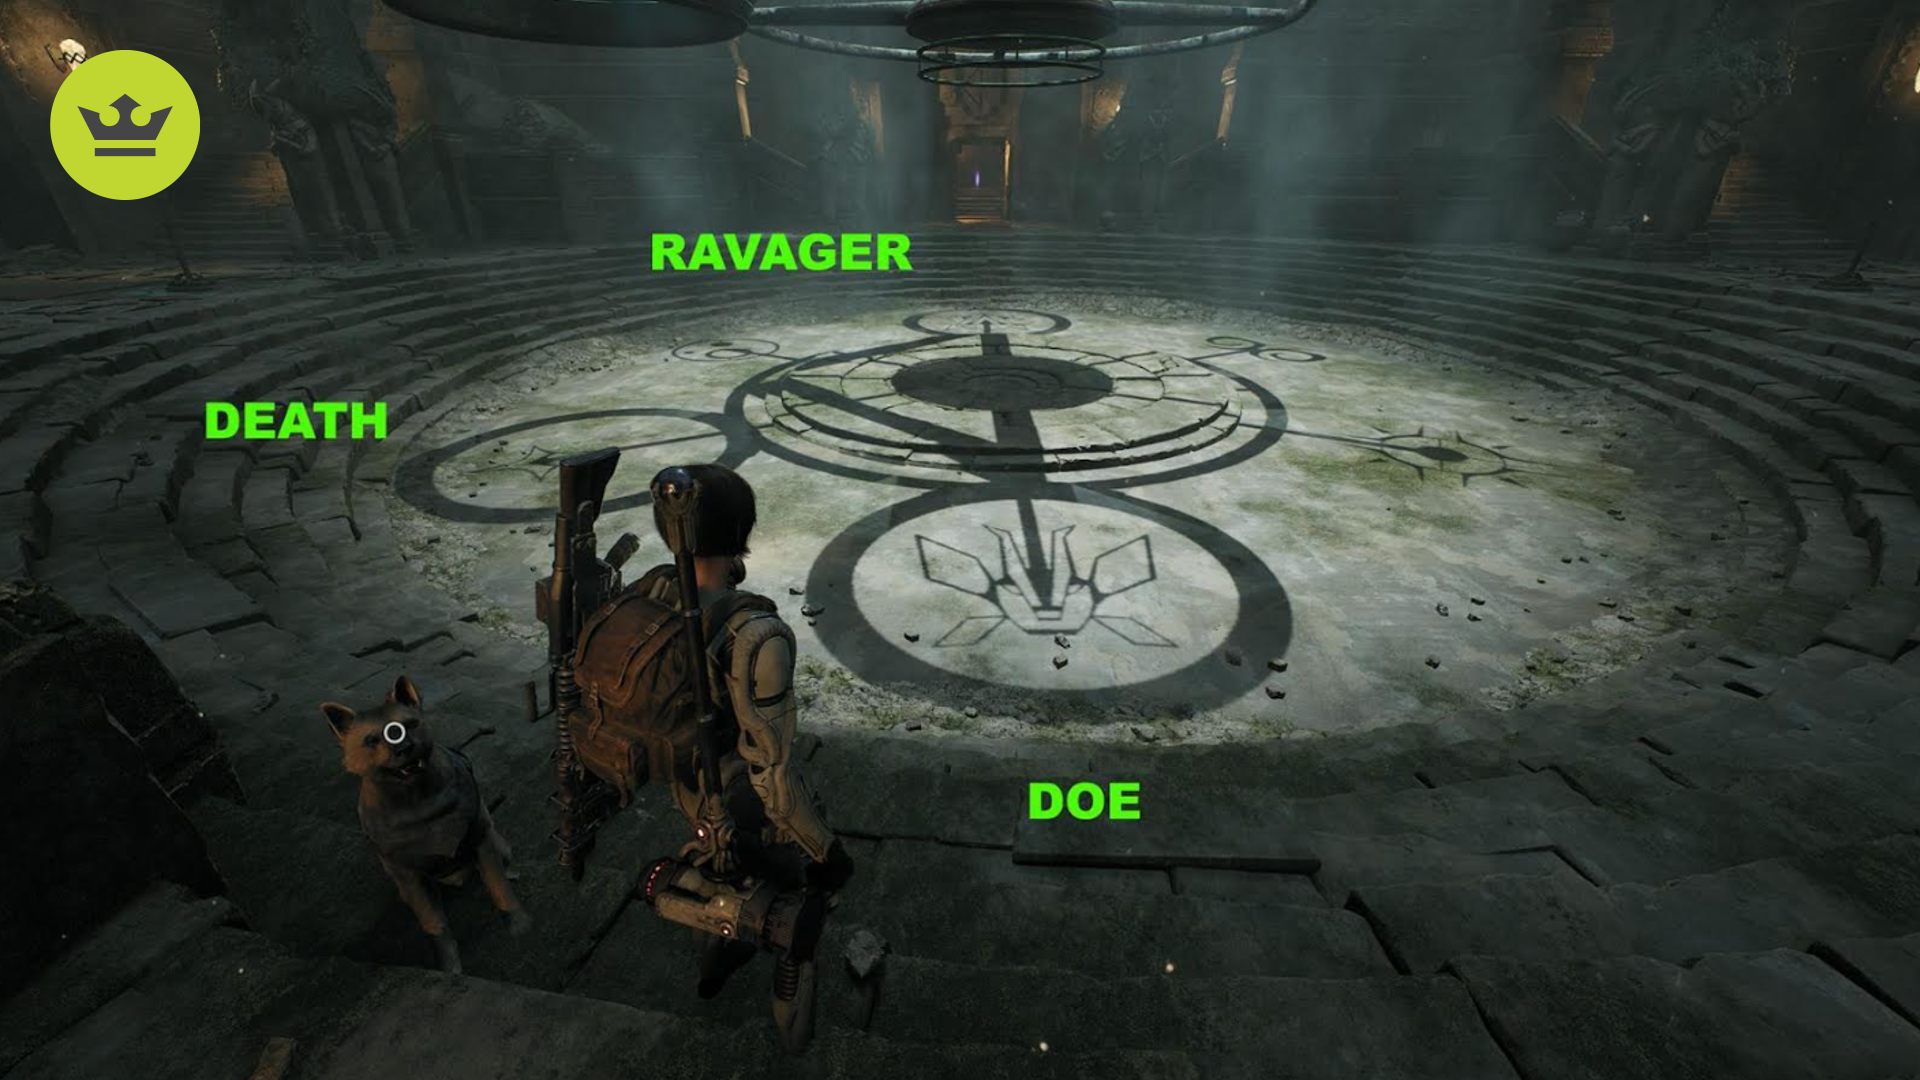
Face the locked door opposite the entrance and you’ll notice that there’s a triangle pointing to the left above the doorway. Then, flip the levers based on the image below and these requirements.
- Ravager: top
- Death: lower left
- Doe: bottom
- Circles: Ravager and Doe are encircled via the front lever; Death and Doe are encircled via the left lever.
Inside the room, you’ll find the Faith Seed material. You can bring it to Ava in Ward 13 to receive the Astral Burst mod. This causes your weapon to fire star fragments that can bounce off walls. Pretty cool, right? This makes solving the Cathedral of Omens puzzle a rewarding venture already.
The Blood Moon solution
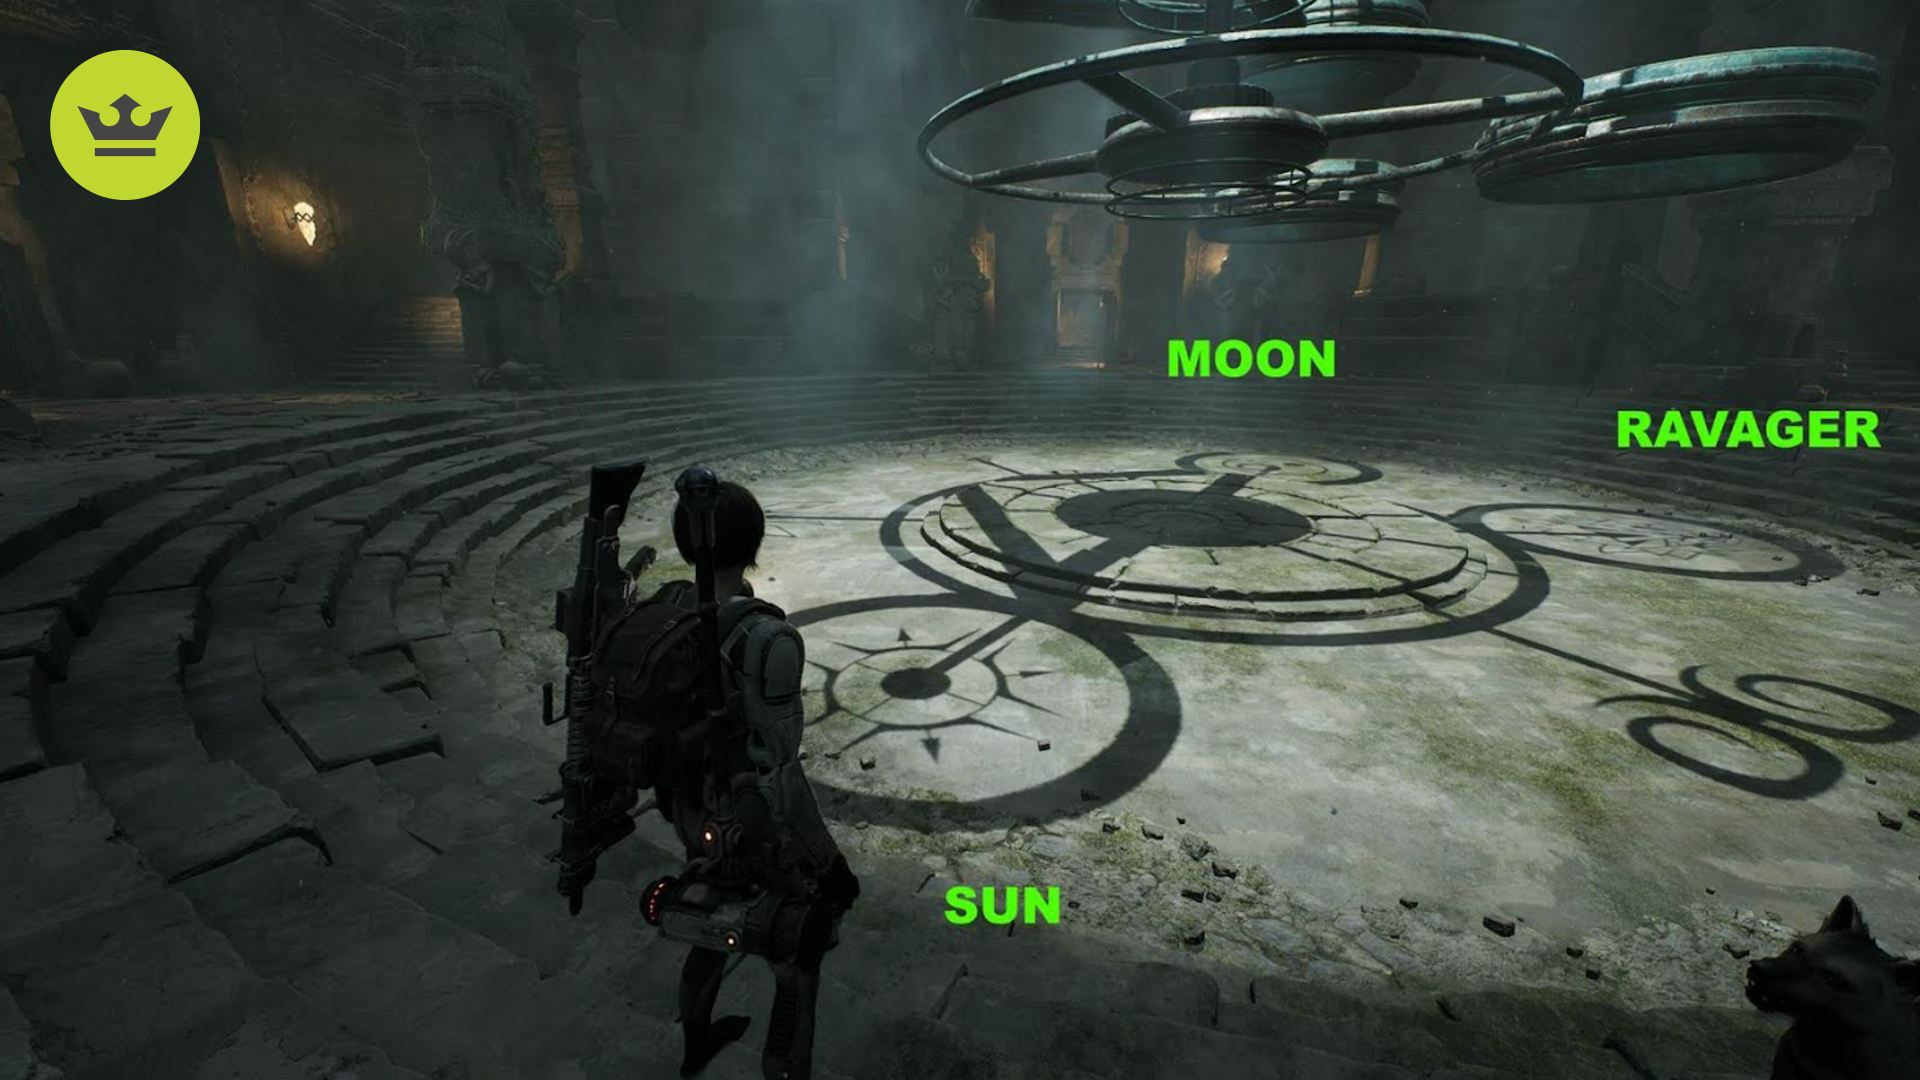
As usual, face the doorway with the corresponding triangle plate. Then, interact with the levers until you see the matching pattern. The pattern is:
- Moon: north, closest to the locked door
- Ravager: to the right of the Moon symbol
- Sun: bottom
- Circles: Moon and Sun are encircled via the front lever; Moon and Ravager are encircled via the left lever.
The door should open. Inside, you’ll find a couple of chests with some materials.
The Hope solution
You might be wondering how to solve The Hope pattern in Remnant 2’s Cathedral of Omens dungeon, especially since there are no locked doors remaining. However, if you look at the entrance corridor, you’ll realize that there’s also a triangular plate above it.
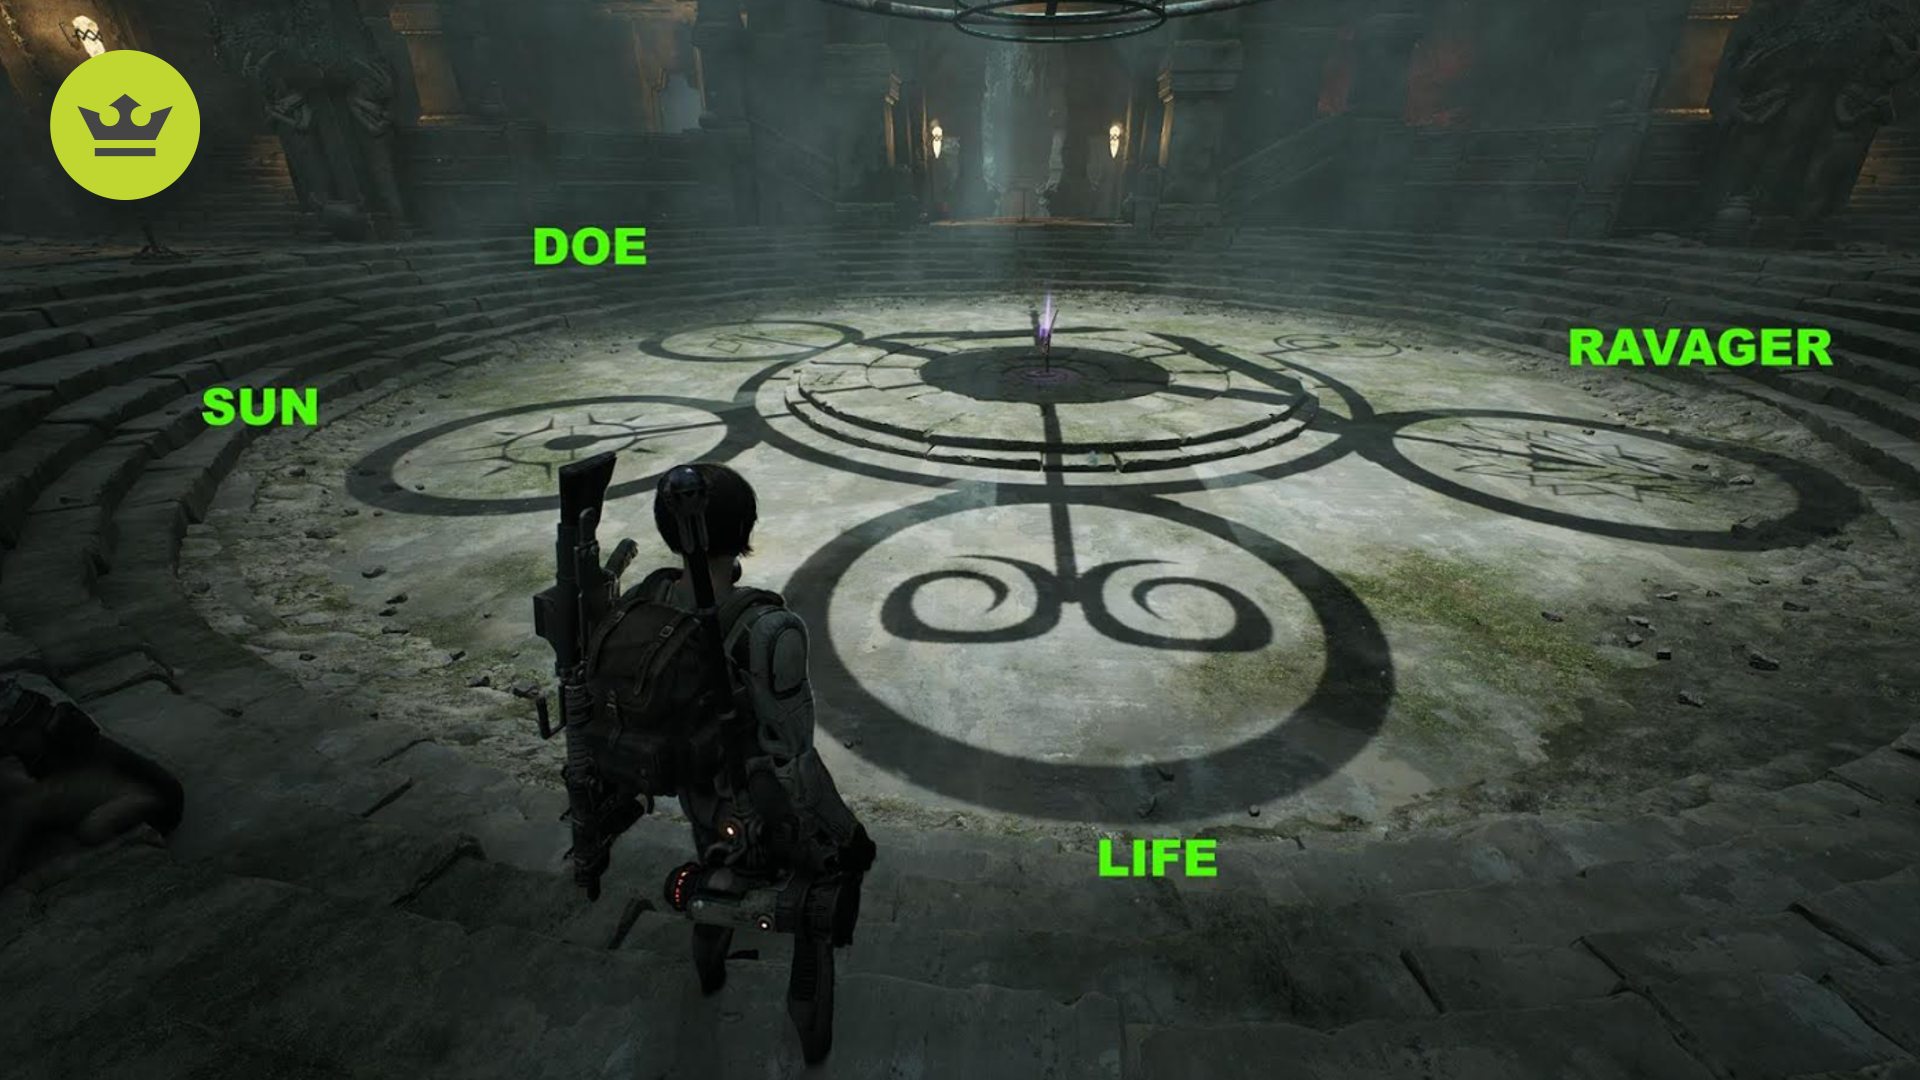
The solution is:
- Doe – topmost; closest to the entrance corridor
- Sun, Life, and Ravager – counter-clockwise from Doe
- Circles: Doe and Ravager are encircled via the front lever; Sun and Life encircled via the left lever
Solving The Hope diagram nets you the Remnant 2 Sagittarius bow – one of the best Remnant 2 weapons. You really can’t do much better than that. After all, Remnant 2 is hard – there’s a reason why its one of the best Soulslike games – so you’ll need every leg up you can get.
The Sagittarius Bow has the following stats and perks:
- Damage: 98
- Rounds-per-second: 4.5
- Magazine: 1
- Draw: Hold the fire button to draw the bowstring for a stronger shot.
- Mod: Starfall – Shoot an arrow that deals damage, while also opening a portal that causes star fragment projectiles to rain down within a small area. The effect lasts for six seconds.
That’s how you solve the Cathedral of Hope puzzle in Remnant 2. Don’t forget that the Yaesha region holds many secrets, including Remnant 2’s The Lament puzzle and Remnant 2’s Water Harp puzzle. For other tips, bookmark our Remnant 2 walkthrough article to help you out during your run.
If you’re looking to deepen your Remnant 2 immersion, be sure to check out some of the best PS5 accessories and best Xbox accessories. After all, you deserve to give yourself a little treat for solving all of those puzzles.
