There are many Lies of P bosses awaiting you in Krat, all of which are ready to bring your journey to an end. Like every other Soulslike, there’s a variety of bosses on offer, meaning it’s not often that you come across two of the same (unless you’re playing Dark Souls or Elden Ring). As such, you need to know all you can about them individually to give yourself the best chance of defeating them.
Given the Lies of P release date is here for PS5, Xbox, and PC you might also want to know all about Lies of P’s best weapons, so you can survive your time in Krat and take on these bosses. There are a fair few weapons to familiarize yourself with and they can have a huge impact on the Lies of P boss fights and how easy you find it. We have details on each boss below, and we’ll offer tips and tricks on how to beat them from our Lies of P review.
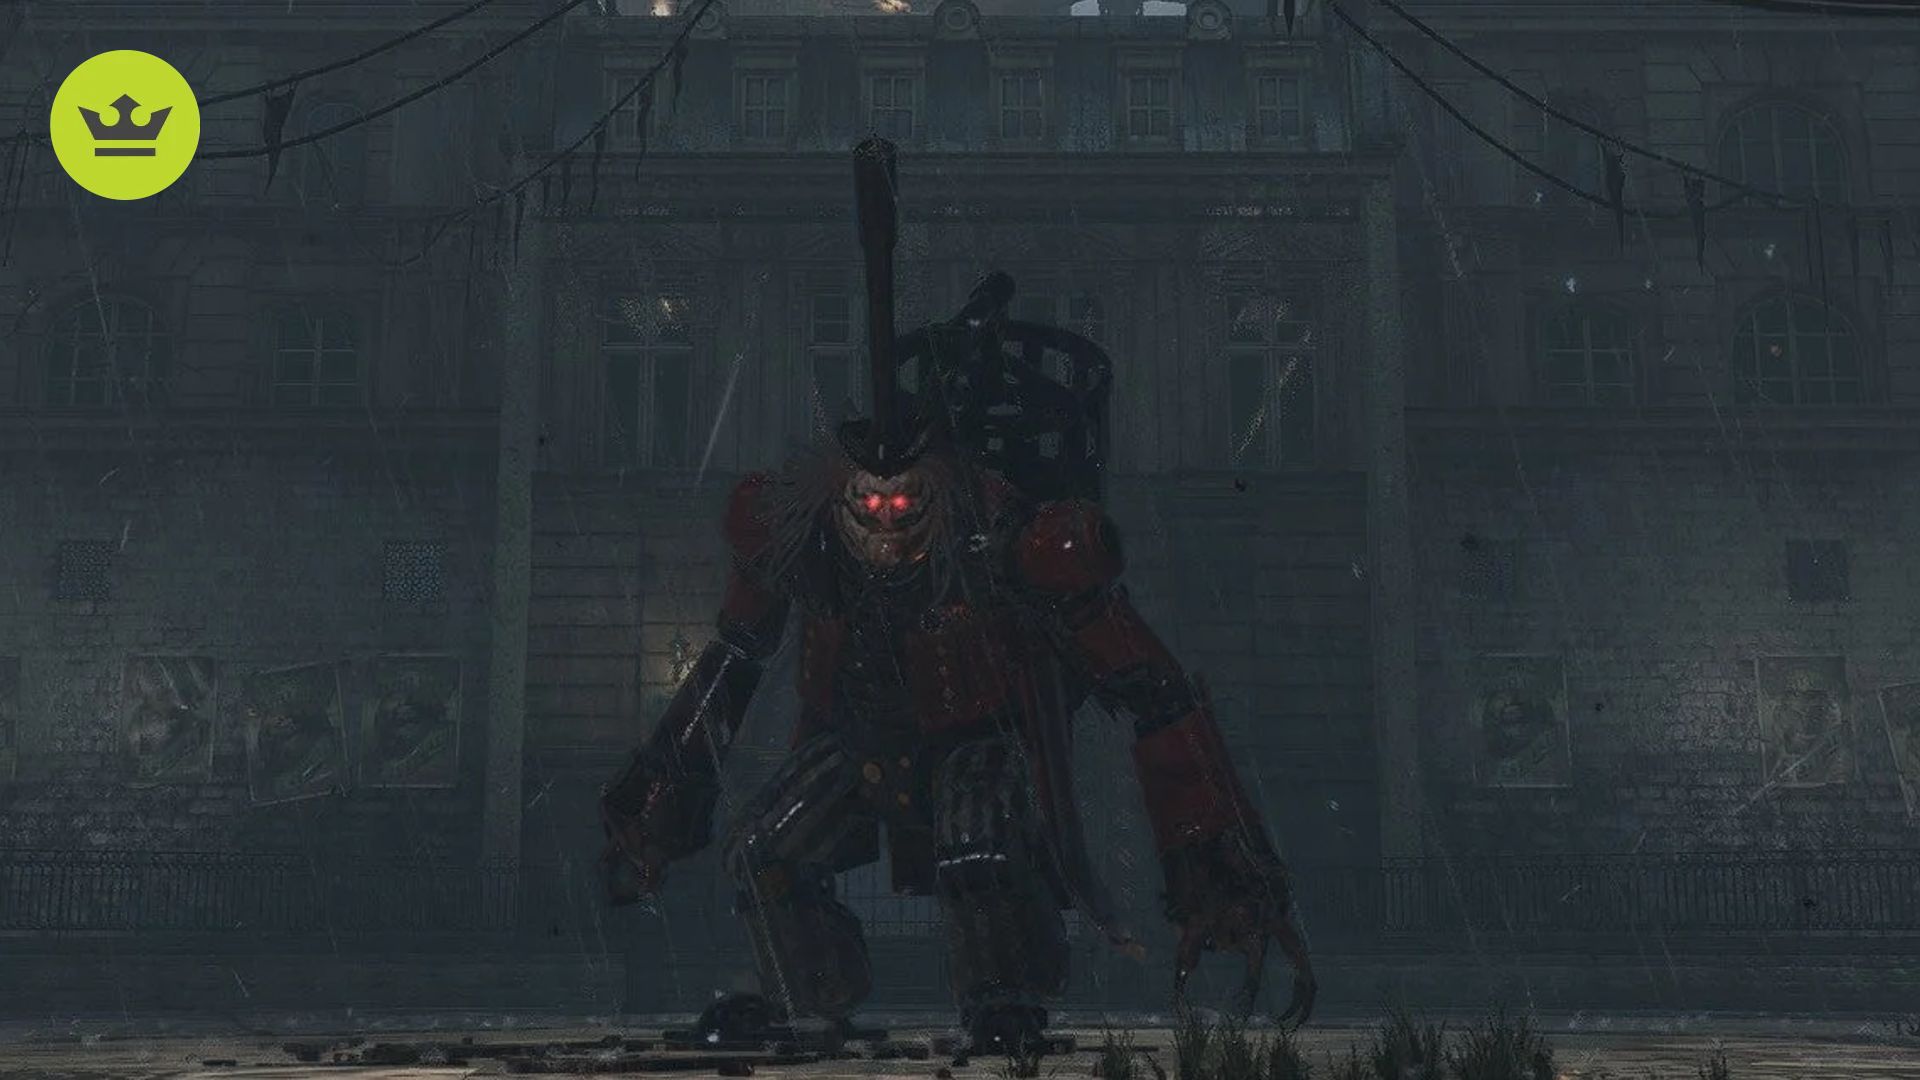
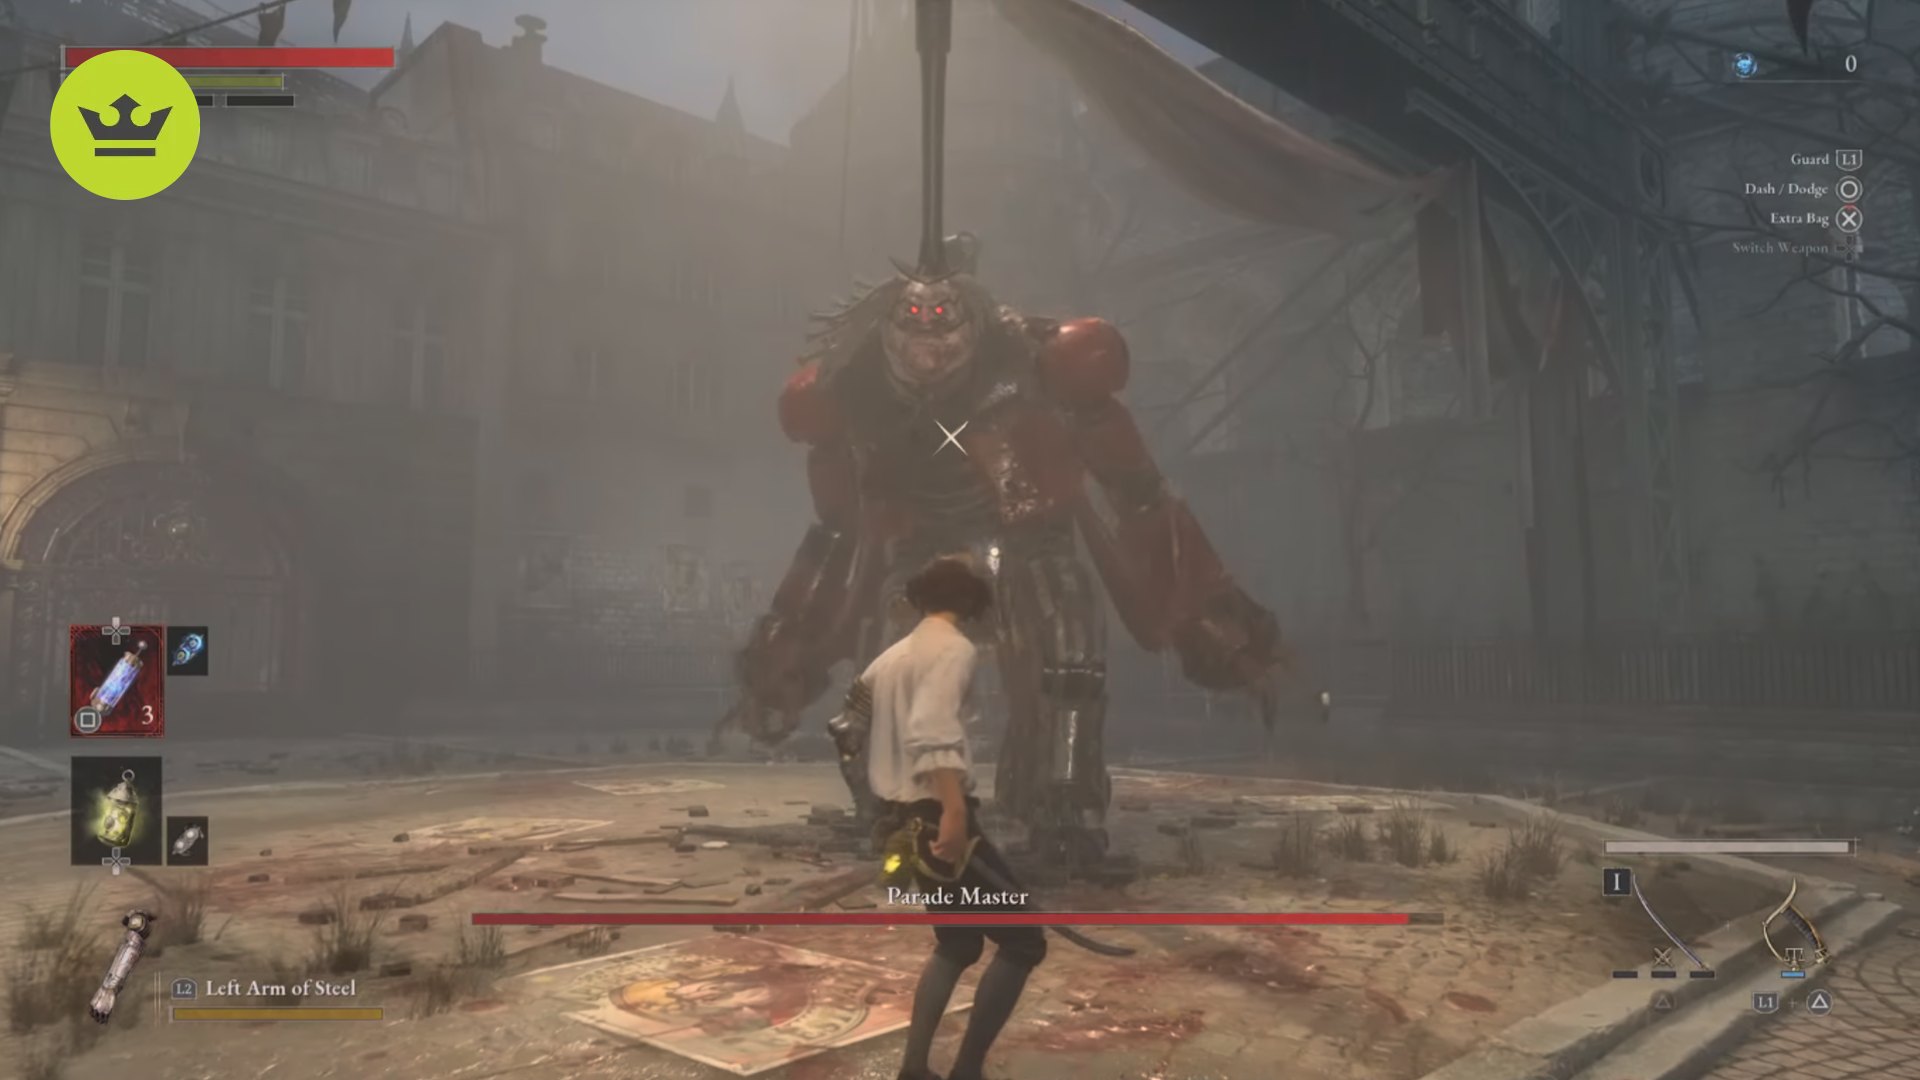
Parade Master
The Parade Master awaits you at Krat Central Station and is the first boss you come across. Though the enemies of Krat are already testing your skill this early in the game, things go up a notch in this boss fight, though his slams and sweep attacks are avoidable with some practice.
Unfortunately, this puppet does move with considerable speed, certainly more than you might expect, given its size. Luckily for you, this is exploitable. If you accustom yourself to dodging, you can avoid its attacks and dash in for some counterstrikes, as it frequently leaves itself open following its own offense.
When the Parade Master loses roughly one-third of his health, it enters its second phase, which is a bit more aggressive than the first phase of the fight. However, your strategy remains the same: wait for it to charge forward and strike, then back away as it goes for another swipe, and then charge in to attack it. You need to keep an eye on its movements. For instance, three steps forward in this phase means its about to unleash a huge, sweeping attack. If you get out of range and dash in for a counter, you can dish some good damage.
You just need to rinse and repeat until the Parade Master is down. Like with most Soulslike bosses, you need to try and avoid being too greedy. We can attest to this, as near the end of the fight, we ended up dying when we got too greedy, ending what was otherwise a fairly clean boss battle.
Mad Donkey
The Mad Donkey is a humanoid figure that awaits you on Elysion Boulevard, making him the second boss in the Lies of P demo. This boss is a great test for what awaits you in the game and may even teach you a thing or two about how you fight. Just like Lady Maria or Ghermain fights in Bloodborne with a moveset similar to the hunter, the Mad Donkey has a similar move set to Pinocchio.
However, he doesn’t have much finesse and just hopelessly to swing his weapon about. A bit of patience and dodging means victory is well within your grasp. When he goes for an overhead swing, that’s the perfect time to skirt around him and give him a trusty backstab. Rinse and repeat throughout the fight, and victory is yours.
Of course, if that doesn’t feel honorable and you’d rather tackle the Mad Donkey head-on, you just need to keep your finger on the dodge button and only go for quick swings with your own weapon. Going for a combo can leave you open to a counterattack. Until the full game releases, we can’t be sure, but we imagine enemies like the Mad Donkey may appear as regular enemies rather than bosses as you progress through the game.
Scrapped Watchman
In Krat City Hall, you can find the third and final boss from the Lies of P demo, the Scrapped Watchman. It’s time for you to lay down the law with this policeman puppet, though this one is considerably bigger than the cops you face on your way here. The first thing you might take notice of is the antennas going down its back, these add electricity damage to its attacks.
When it comes to landing attacks against the Scrapped Watchman, you need to be light on your toes and have a bit of patience. This boss favors extended sweeps and charge attacks giving him a wide berth for attacks. We suggest you keep yourself just out of reach and dash in for damage after it charges at you.
If you get lucky, the boss may leap into the air. If you manage to move out of the way and avoid being staggered by it, you can rush in and land a full combo instead of just a couple of hits. This is what you should aim for throughout the second phase, too. Unlike some bosses, the Scrapped Watchman doesn’t get any new attacks of note, but those antennas come into play, electrifying the boss and its attacks.
Furthermore, while you’re likely to be able to avoid its charge and jump attacks with ease at this point, lighting reigns down on the area periodically throughout the remainder of the fight, so you need to keep a close eye on your surroundings. If the lightning gets you, not only do you take damage, you lose a chance to get some hits in.
King’s Flame, Fuoco
There are two phases to the King’s Flame Fuoco fight, and in the first one, you want to stay behind the boss. As soon as the fight begins, dodge through his initial attack so that you’re behind him, land one or two attacks, and then prepare yourself to dodge around him as he swings around to face you. His main attacks are sweeps, strikes, and slamming his hands on the ground – all are easily avoided if you get behind him.
For the second phase, you need to first get out of the way as he’s about to explode with fire and light up the floor in his immediate vicinity (if you get hit and overheat use a purification module). After that, he should charge at you with an unblockable attack, all you need to do is dodge to either side. Then, you can charge in and land some hits. Back away and try to bait the same attack. Rinse and repeat until victory is yours.
If you have some electric blitz abrasives, you can use those for some great damage, as the King’s Flame is weak to that element. Or, if you need a helping hand, you can summon a specter directly outside the boss room.
The Survivor
The Survivor is located in Venigni’s factory and is the second Stalker boss you can face in the game. He isn’t mandatory, but you need all the ergo you can get, so fighting him is a good idea. When you find him, you’re in a relatively small space, so you need to be on your toes. He’s more aggressive than the Mad Donkey, but you can use this to your benefit.
Frequent dodges allow you to get behind for backstabs. Keep dodging to the side and getting space when you need it, and you’ll beat The Survivor in no time. Also, as with any Stalker enemy, his attacks are easily parryable, so if you do that consistently, you can eventually stagger him. Landing heavy attacks from behind is a good method to achieve this.
Fallen Archbishop Andreus
Located at St Frangelico Cathedral, with library stargazer being the closet. The Archbishop is a challenging fight for this point in the game, especially because the boss is split into two phases with two health bars. During the first phase, you want to get behind the boss and attack its back, though you need to be wary of the boss swinging around with a sweeping attack. Not only that, but its attacks inflict decay, and should your stat bar fill up, you become inflicted with it and must use a purification ampule to cure it.
When the second phase begins, the Archbishop appears on the other side of the monster, so now it’s not a good idea to be behind the boss, as both ends have limbs to attack you with, you now need to stick to the left side of the boss, making sure to dodge forwards to avoid the sweeps.
Eldest of the Black Rabbit Brotherhood
This is an unfair fight, as while you’re technically only against the eldest member of the brotherhood, his fellow brothers are part of the fight as well, and towards the end, you might be in a four-on-one situation. As such, it’s a good idea to bring in a specter with you and stock up on the electric abrasives to apply the shock effect to the boss.
Furthermore, it’s worth remembering that backstabs are a lifesaver against Stalkers, so keep on your toes, dodge around the main boss, and try to keep some distance from the other brotherhood members. Bringing in a specter does help to keep the brothers apart, and that’s crucial to winning this fight.
White Lady
The White Lady is found on Rosabella Street on the way to the Opera House. Unlike the stalkers you’ve faced so far, she heavily favors speed and agility, so much so that getting a backstab in may feel like a mountain of a task. Therefore, it’s best to bait her attacks and get a hit in on the counter.
Frequently, she dashes forward and follows it up with two thirst attacks, which are punishable so long as you don’t fall victim to the combo. While she’s quite a challenging fight, she’s a bit more of a breeze if you’re comfortable with the perfect parry. Oh, and she happens to use fire abrasives, so bringing some purification ampules with you is a good idea.
Romeo, King of Puppets
The King of Puppets awaits you in the Krat Opera House, and he’s yet another two-phase fight with two different health bars. Luckily, the first phase is pretty easy, as the King moves quite slowly and, as a large opponent, has plenty of areas for you to swipe at. If you bring in a specter, the first phase is a breeze as you can hit the King of Puppets from behind, using heavy attacks to get him into a staggered state, allowing you to cause maximum damage.
You can also use electric abrasives to help you out, and we especially suggest you use them in phase two, as Romeo is a much faster foe that has some deadly combos. Here, you want to keep your distance and get a hit in on the counter. If timed right, you can land consistent heavy attacks at the end of his combos, increasing the speed at which you can stagger him.
Champion Victor
Champion Victor isn’t too difficult for where he is in the game. Found at the Grand Exhibition, the Champion favors slow but hard-hitting attacks, so it’s quite an easy bout for those who are light on their feet. As he uses acid attacks himself, it’s no use using acid-based items here.
However, he’s susceptible to fire, so bring some abrasives and consider equipping your grindstone with the fire option too. As ever, you can bring a specter along with you, and though the Champion can kill them relatively quickly at times, they’re a good enough distraction to allow you to inflict a status effect and get some good stagger damage in.
Doctor Owl
Doctor Owl is like most other Stalkers, but he likes to throw items alongside using his dagger. As you’re in a small hut, it’s a good idea to make use of blocks and perfect parries. However, if your dodging is on point, you can dodge to the side, dash forward, and turn around to get in a backstab. If you want to face the Owl, you can do so in the Barren Swamp, in the area preceding the two Future Puppets.
Puppet-Devouring Green Monster
The best way to ensure victory against the main boss of Barren Swamp is to dodge to the left and use fire in the first phase. However, the second phase calls for a different tactic entirety. You need to switch out the fire for acid and put your perfect parry skills to the test, or, at the very least, have your last-minute dodging down to art to afford the deadly charge attacks.
This is a fight of patience, for if you lose too many healing items in the first phase, the chances are you won’t live to see the end of the fight. We suggest bringing in a Specter and equipping the friendship stone to the wishstone cube, as this restores health to your specter.
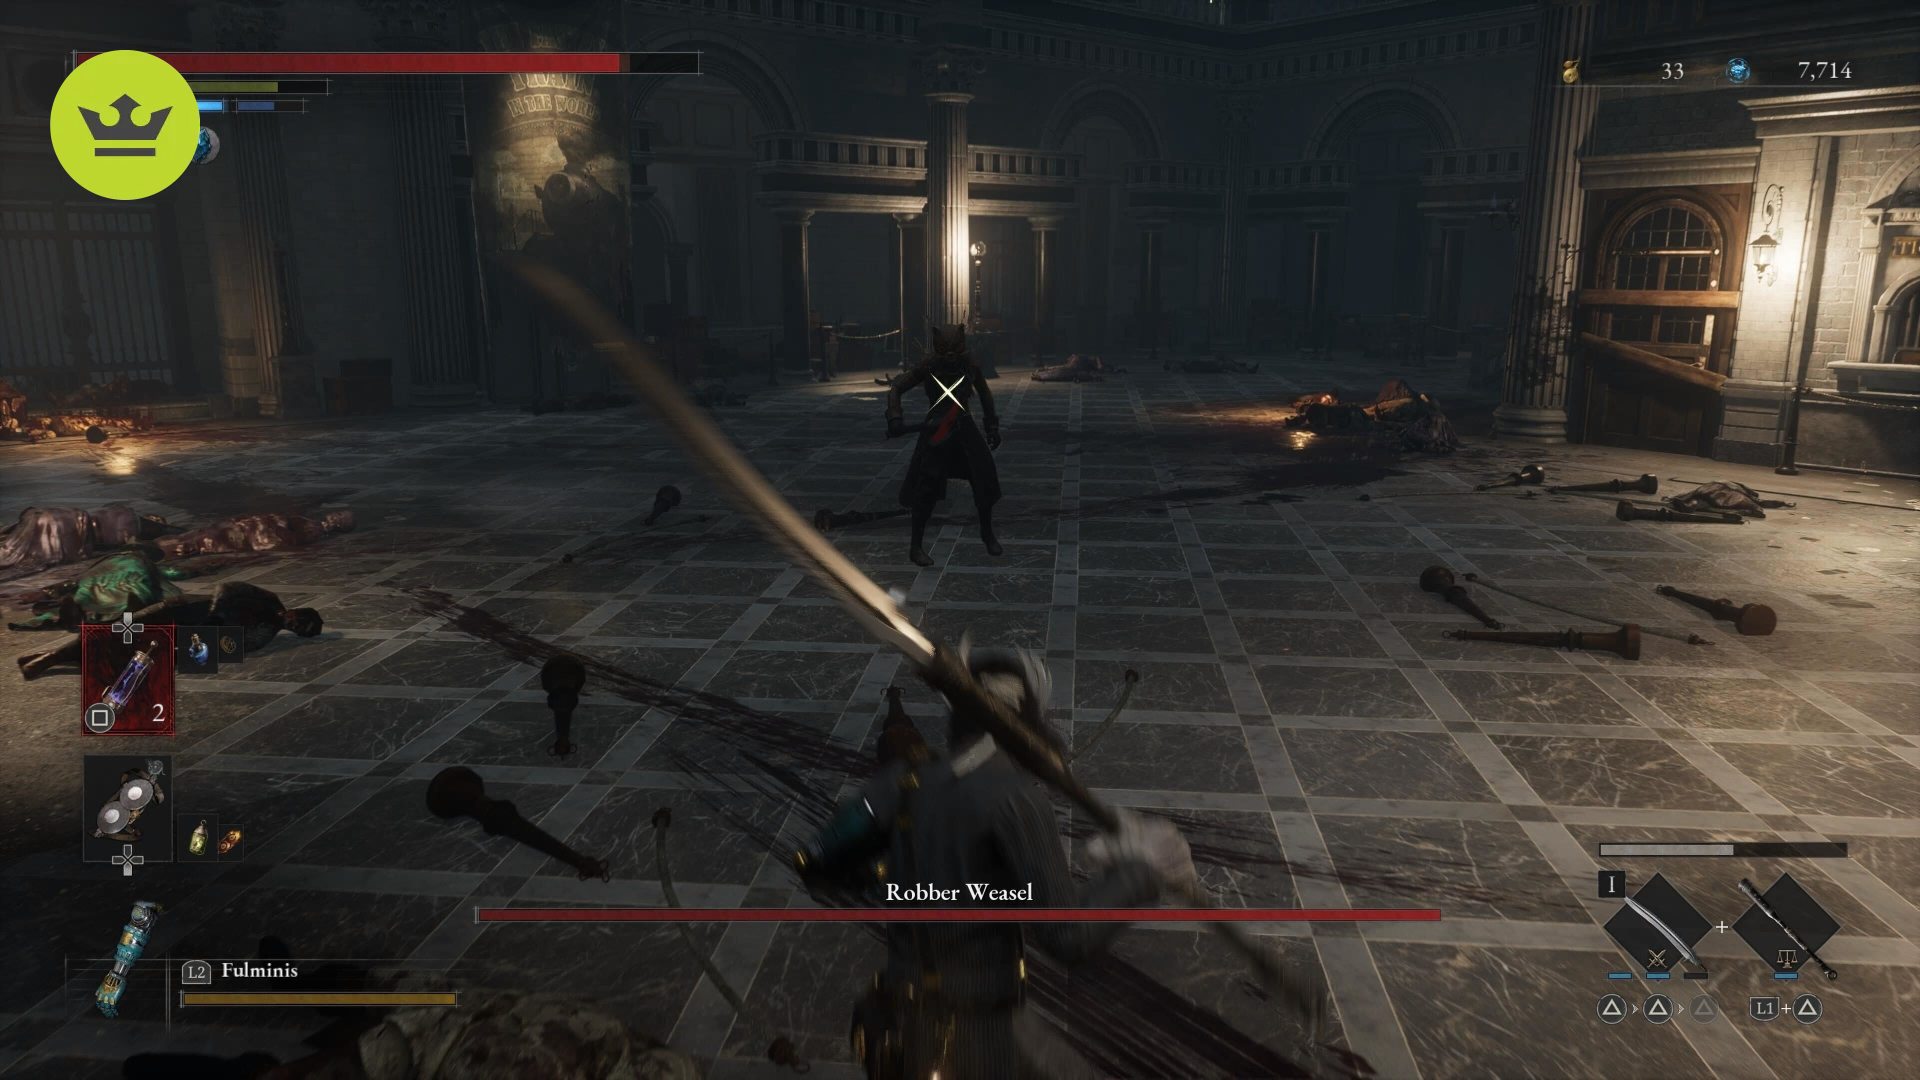
Robber Weasel
The Robber Weasel takes things up a notch as a Stalker. When you find her after your return to Krat Central Station, not only does she throw items like the Doctor Owl, but she moves fast like the White Lady and makes use of fire items. To beat her, it’s best to use backsteps as your primary dodge. It makes it easier to beat her at her own game by throwing projectiles of your own. Fire and acid have devastating results, as do backstabs if you’re able to move quicker than her.
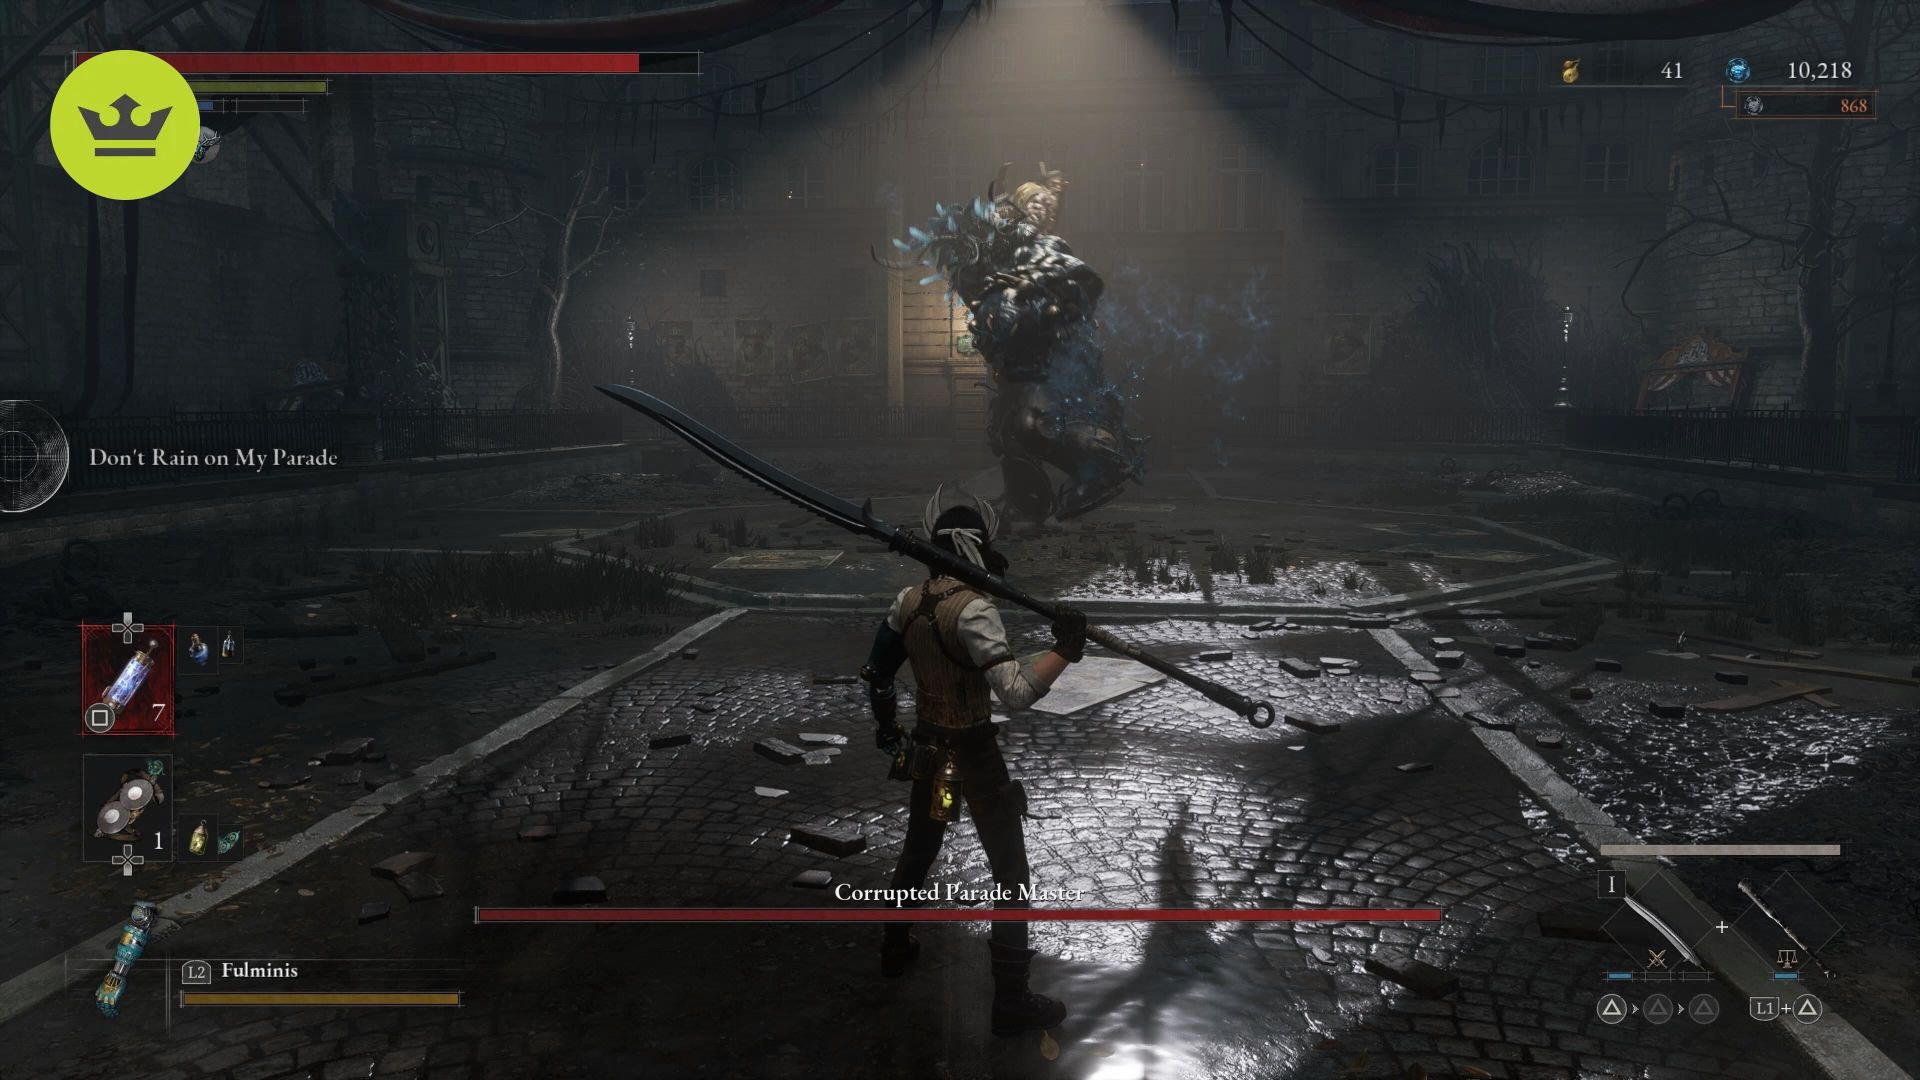
Corrupted Parade Master
The Corrupted Parade Master doesn’t differ too much from the first boss of the game. However, he’s now scaled for the endgame and inflicts the decay stat with his attacks. The best thing you can do is dodge to the left for slam attacks, forward through the swipes, and give one or two strikes before retreating. If you’re using a greatsword, it’s worth dodging to the side and around during a slam attack, as you can land a heavy attack to increase the stagger meter.
If you keep calm and block should a dodge not be feasible, you’ll be fine, so much so that you won’t miss the fact you can’t summon a specter for this fight.
Black Rabbit Brotherhood
It’s time to face the rest of the Black Rabbit Brotherhood, and all of them are out for revenge, so you can expect to face all three of them at once. Each brother has his own health bar, so bringing a specter with a friendship or resurrection wishstone is advised. Each of the three brothers uses a different offensive element – acid, fire, and electricity. The best approach is to let your specter handle two at the start, allowing you to pick off one of the brothers. They have relatively weak health, so it doesn’t take long to beat them. However, when the last remaining brother drops to below half his health, the eldest brother makes a very aggressive comeback.
If you bring some fire and eclectic items, bait the charge attack, and avoid being too greedy, you’ll be able to finish the Black Rabbit Brotherhood for good. Should the specter still be alive at this point, let him take the aggro as you land heavy attacks to put the boss into a staggered state.
Black Cat
Black Cat is surprisingly easy to fight at this stage of the game. Though he doesn’t want to fight you, he does, and he comes at you with some impressive agility. It’s just a shame for him that he wields a spear, so it’s easy to get behind him for a backstab after he launches an assault. As ever, you can use items to increase the damage you do – any and all abrasives are effective against Black Cat.
Laxaria
Laxaria is a true endgame boss, but we can’t stress how vital it is to break her shield in phase one. Until you do, you can’t damage her from behind, and if she reaches her second phase with it intact, oh boy, are you going to be sorry.
In her second phase, she makes great use of electricity, so bringing purification ampules is essential, as is using acid abrasives to do extra damage to her. Her attacks are sporadic and hard to pinpoint, so the best thing to do is bring a specter with the healing wish stone so they can take plenty of the aggro.
Red Fox
All of the fights against Stalker come down to this. Red Fox is by far the most dangerous human you come across. You have to be very light on your feet and pick your moment to strike wisely. She recovers quickly and is hard to stagger. In fact, she moves so fast that backstabbing isn’t a viable tactic.
To win, you just need to be better than her and be able to land those perfect parries to have any chance of getting her into a staggered state. Red Fox is waiting for you just ahead of Geppetto’s cell near the top of the tower in the Abbey.
Simon Manus
Unsurprisingly, Simon has two different phases with two different health bars. Dodging backward is advised as a couple of his attacks, namely slamming his weapon into the ground, has some AOE damage. Furthermore, if you get trapped in his white circle of death when this happens, it’s bound to end the fight quickly.
When you reach phase two, he becomes extremely aggressive, so much so that you need to block and parry as much as you can, and hope that your specter is still with you to unload some of the pressure. You can find Simon at the top of the tower in the Abbey.
With that, you know what you need to know about the Lies of P bosses. Fighting them may seem like a challenge at first, but Lies of P’s best builds can definitely give you an advantage.
