This Sons of the Forest building guide will take you through everything you need to know about the mechanic. Building is a blast — as long as you know what you’re doing. Unfortunately, building bases and structures isn’t always intuitive, so it helps to understand how it works.
There’s a lot to cover in Sons of the Forest, but by the time we’re done here, you’ll have everything you need to know to keep your base secure from the cannibals and mutants that try to attack it. That way you can build a great structure for your area on the Sons of the Forest map to survive and hide out.
Sons of the Forest building explained
In Sons of the Forest, there are two different building modes. One is the mode you will default to in the game’s tutorial, which allows you to place logs, sticks and other items at your whim and then use the guidelines to help you build your base exactly how you want it to be. The other is reminiscent of the building in The Forest.
The latter essentially allows players to palace ‘ghost’ structures and then fill them with the materials needed to complete the structure. Ultimately, this mode is dramatically improved from the game’s predecessor, making building things like birdhouses to collect feathers and animal traps simple. The other mode is a bit of a change from how the building worked in the original, as your base building isn’t limited to buildings for which you have a guide.
You can swap between the two options with a key press, which defaults to ‘X.’
Sons of the Forest building items guide
Here’s a list of items you can build in the normal Sons of the Forest mode:
- Tent: Use a tarp and two sticks to build a portable sleeping spot and save location.
- Basic fire: Use to stay warm, cook food, and burn enemies for bones.
- Reinforced fire: More structurally sound than a basic fire, you can add firewood to extend your fire’s lifespan.
- Standing fire: Another option for a fire.
- Skull lamp: Use to light the areas around your base.
- Stick structures: Use as decor to scare potential enemies from entering your base.
- Reinforced structures: Similar to stick structure, but can better withstand attacks and damage.
- Fence: An easy way to keep unwanted guests out of your base area.
- Floor: Use your base to support beds and chairs.
- Wall: Stack logs to build the walls of your base.
- Door: Chop a hole into a wall and place logs as guided to build a way into your shelter.
- Window: Chop to make a window to let light in or keep an eye on enemies.
- Single step: Your shelter may not naturally be on flat ground, so you can build a single step into it at your doorway or use it as desired.
- Basic beams: Add additional structural support to your base.
- Roof: Necessary for protecting yourself from rain and snow while in your base.
- Struts: Provide additional structural support.
- Stairs: Useful for building multi-story bases.
- Ramp: Can be used to more easily navigate to and away from different levels of your base or in a decorative sense as desired.
- Defensive wall: Essential for protecting your base. Build early, as these will protect you and prevent unwanted visitors from spotting and attacking you.
- Rope: Used to climb and navigate your structures, particularly if building in trees.
- Rope bridge: Can be used to build across bodies of water for faster navigation.
- Firewood: This will make your fire last longer.
When playing the game on normal mode, you’ll find tips on the game screen instructing you to open your build guide, which defaults to ‘B.’ Here, you’ll find a visual resource for the game’s customisable elements, such as buildings, windows, doors, campfires, structures, and more.
This build mode can be finicky, so it takes trial and error to get it right. Set aside time to get the mechanics right, so you don’t waste precious time in the main game having to rebuild your base. Holding certain items, such as logs or sticks, will automatically provide instructions on how you want to use them. For instance, you can use a stick to make a fire or change it to use it vertically as part of a structure designed to help keep cannibals and mutants away.
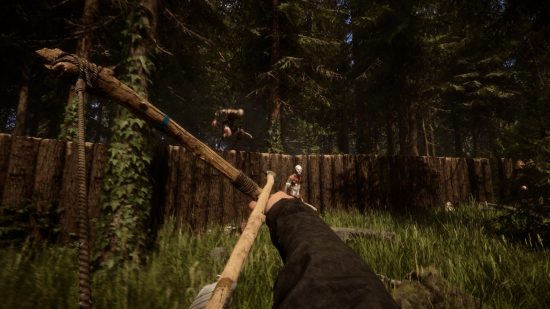
White guidelines typically indicate that you can place an item in a specific location and in a particular manner, such as guidelines showing how to place roof pieces. When holding your axe, red dotted lines show when you can chop something, such as the sharp tops of defensive fences.
Sons of the Forest classic building items guide
As mentioned, you can also build several pre-built items, most of which have additional utility for survival purposes. Here’s a list of build options, along with their uses when it comes to Sons of the Forest classic building items.
- Shelter – hunting shelter, small log cabin, lean to, lookout tower
- Tree shelter – Tree platform (1), tree platform (2), tree shelter (1), tree shelter (2)
- Furniture – Stick bed, stick chairs, bone chair, bone chandelier, wall torch, ceiling skull lamp, bench, table
- Storage – Stick Storage, rock Storage, log storage, bone storage, drying rack, mannequin, shelf, wall shelf
- Utility – Rock path, stick path, birdhouse, scarecrow
- Gardening – Standing planter, water planter
- Traps: Small animal trap, fish trap, bone maker trap, fly-swatter trap
Different types of shelters may be more convenient for you to serve basic needs. For instance, a log cabin can make an efficient home base, while a look-out tower is helpful for looking out for incoming enemies. Similar to a shelter, tree shelters can help protect you from ground-dwelling creatures such as some mutants.
Furniture can be both decorative and provide utility, such as torches that give light and a stick bed that will act as a sleep point and a save point. Storage will make building much more efficient. You’ll use sticks in building everything from traps to furniture, so it’s helpful to send Kelvin to collect these for you, so you always have a stockpile in your stick storage.
You can use rocks to reinforce fires and structures, so it helps to have extras, alongside logs in log storage. Although you can only store six logs in each, these are helpful to have on hand as you build up your base. Bone storage is for when you want to collect bones as you can use them for armour and furniture crafting. A Drying rack allows you to Place food on a drying rack and dry which means it won’t spoil as cooked food and raw food will. You can dry meat, fish, and limbs, so place several of these, so you have food to make it through winter.
A Mannequin is used to place armour. Meanwhile, a shelf adds additional storage to your dwelling. Finally, a wall shelf adds even more storage to your dwelling. Utility items have several varied uses. The rock path can be used to help traverse your base more quickly or simply for decorative appeal, like the stick path. The Birdhouse is used to collect feathers while the scarecrow is used to scare away birds that may attack your garden.
For gardening, the standing planter is used to grow plants from seeds during warmer seasons. The wall planter is used to grow plants from seeds during warmer seasons. Finally, there are traps; whether capturing an animal or a human, these items can be useful to help you along the way. A small animal trap is used to trap and kill small game. A Fish trap can be placed in an underwater area to attract fish to spear A bone maker trap is used to set humanoid beings on fire. Then a fly swatter trap is used to capture and kill big game animals.
That’s our Sons of the Forest building guide. As you traverse the mysterious island building bases, don’t forget to check out our Sons of the Forest multiplayer guide for more insights about how to play with your friends and our best Sons of the Forest weapons guide.


